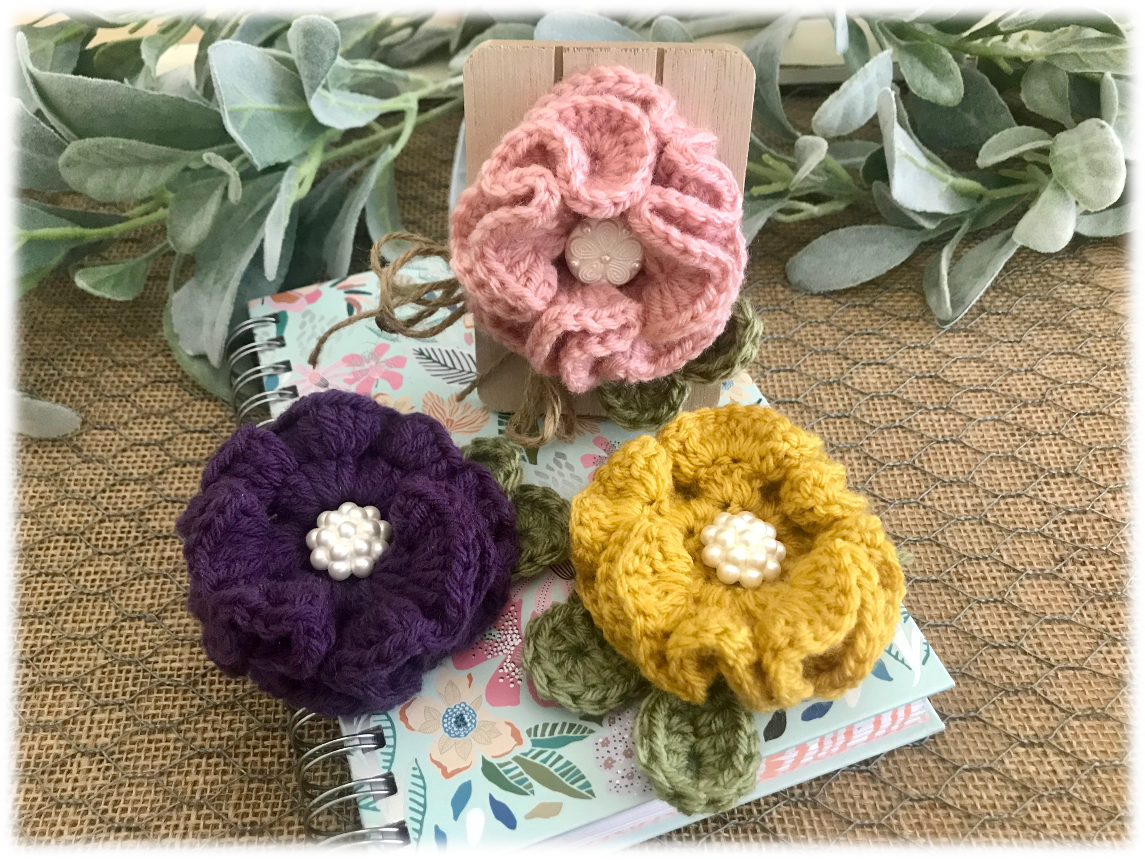
These Simple Crochet Decorative Flowers are truly SO SIMPLE to make and can be done in under 1 hour! Find the FREE flower and leaf patterns below with photos for visual content and a few ideas for use.
INSPIRATION
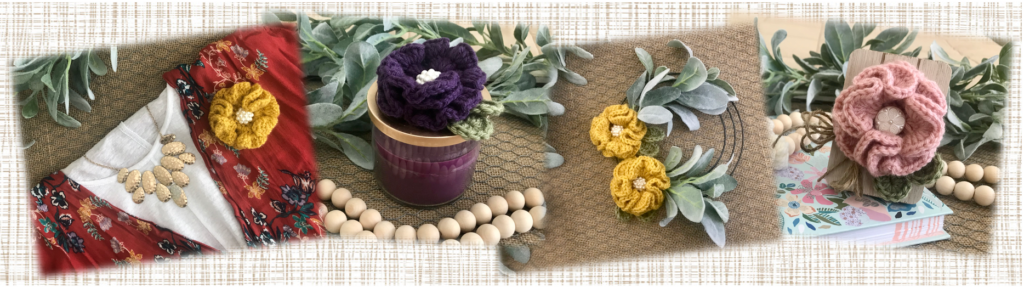
When I was getting ready for Mother’s Day this year, I was thinking back on past Mother’s Day celebrations and was reminded of the crochet flowers that I made a few years ago and gave to each of the mothers at our brunch. I added a pin to the back so they could be worn as brooches and they were a hit with all the moms. Although I didn’t get this flower pattern posted before Mother’s Day this year, I did want to put these pretty decorative flowers on the blog while it is still spring. While my original crochet flower was intended to be a brooch, I have included a few other creative ideas for displaying these pretty flowers.
CROCHET SKILL LEVEL
EASY
The pattern for these Simple Crochet Decorative Flowers is an easy level pattern that uses basic repetitive double crochet stitches with simple finishing for the flower, and basic sc, hdc and dc stitches for the leaves.
PROJECT MATERIALS
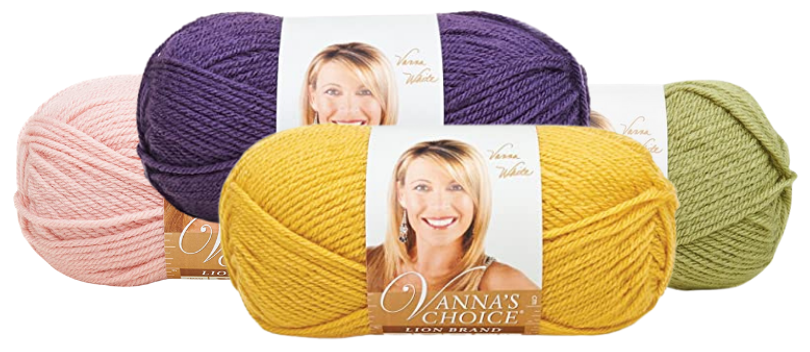
YARN - for these crochet flower brooches I used:
Lion Brand Vanna’s Choice Yarn in MUSTARD, PURPLE & PINK (Flowers) Med 4 /100% Acrylic/ 121 yrds Partial Skein each
Lion Brand Vanna’s Choice Yarn in DUSTY GREEN (Leaves) Med 4 /100% Acrylic/ 121 yrds Partial Skein each
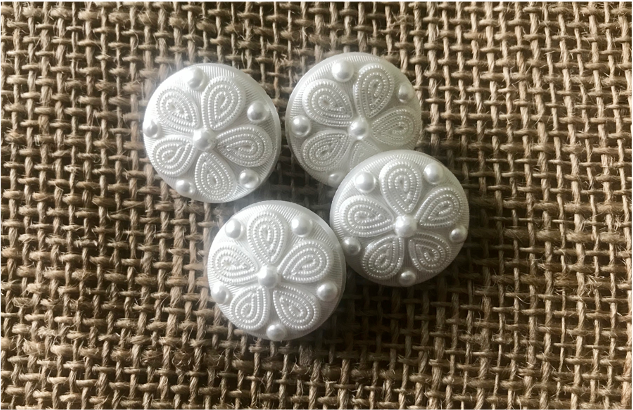
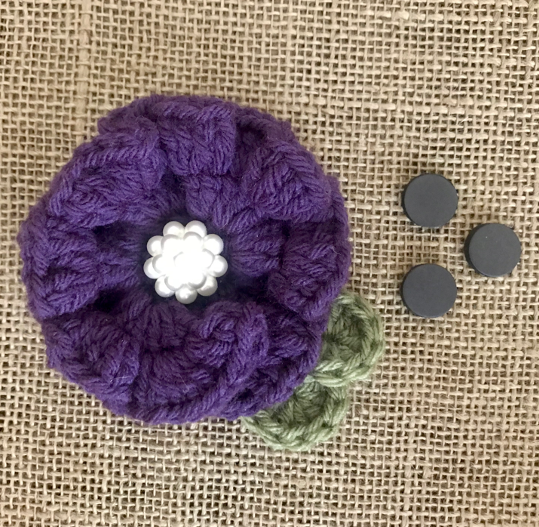
Fashion Novelty Button – 7/8″ (for center of flower – I used pearl-like buttons) Scissors Sewing Needle (for sewing on button) Yarn/Tapestry Needle
OPTIONAL NOTIONS (for decorative purposes)
See IDEAS FOR DECORATIVE USE Below
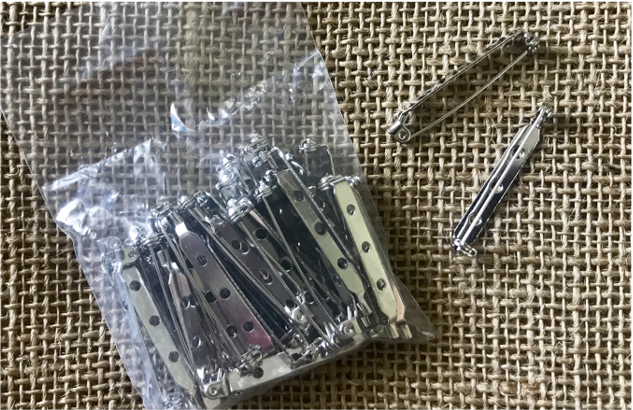
IDEA #1 – FLOWER BROOCH Pin Back – 1.5″ (38mm)
IDEA #2 – FLOWER MAGNET Glue Gun Magnet Discs
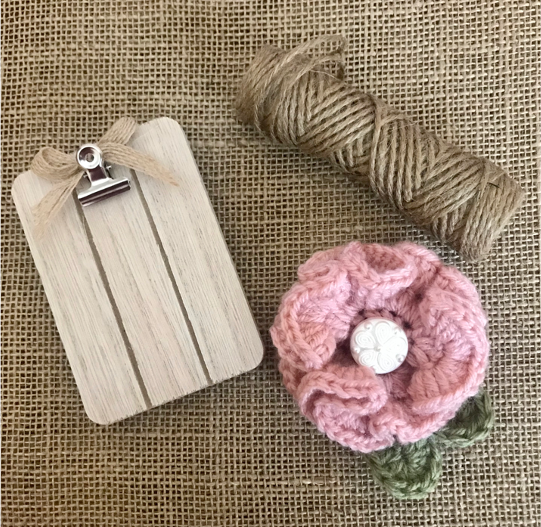
IDEA #3 – MINI STANDING CLIPBOARD WITH FLOWER Glue Gun Jute Twine Mini Clipboard
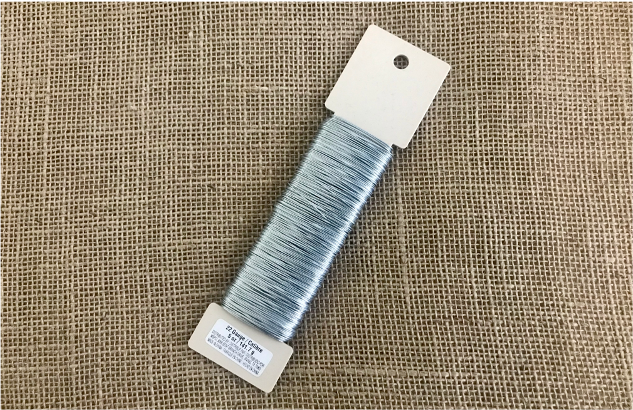
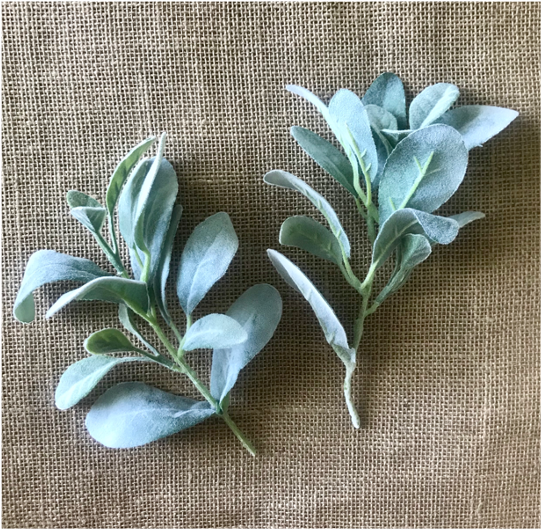
IDEA #4 – SMALL FLOWER WREATH Flocked Lambs Ear Spray Floral Wire – 22 Gage Wire Cutters Wire Wreath Ring – 8″ (20.3cm) Yarn the same color as crochet flower
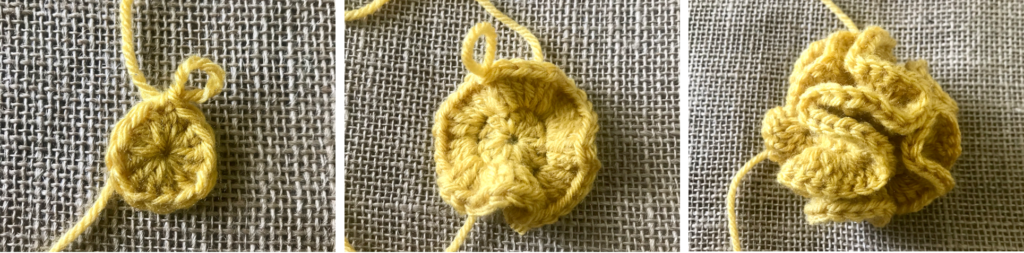
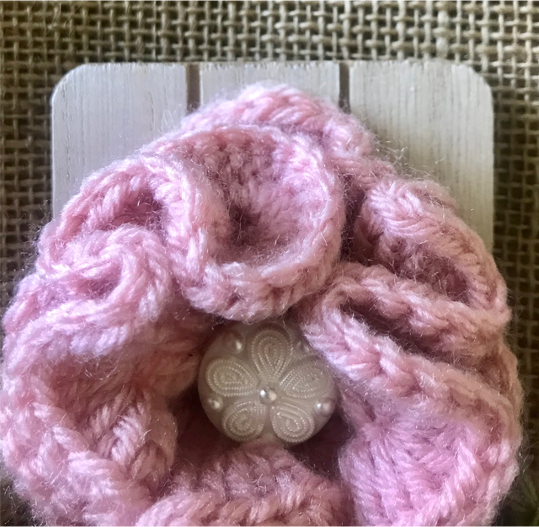
From the backside of the flower, spread out and separate the ruffled petals.
Turn the flower over with the backside now down, then press down on the top of the flower with your hand. This will flatten the backside and spread out the ruffled petals on top.
Continue to spread out and shape the ruffled petals with your fingers, leaving enough center open to add the button embellishment.
Add Your Heading Text Here
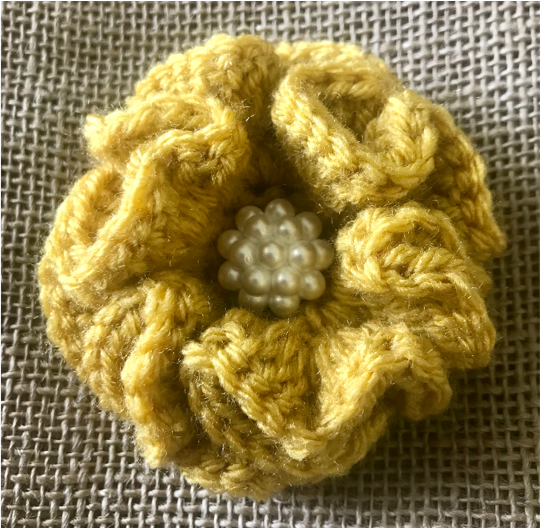
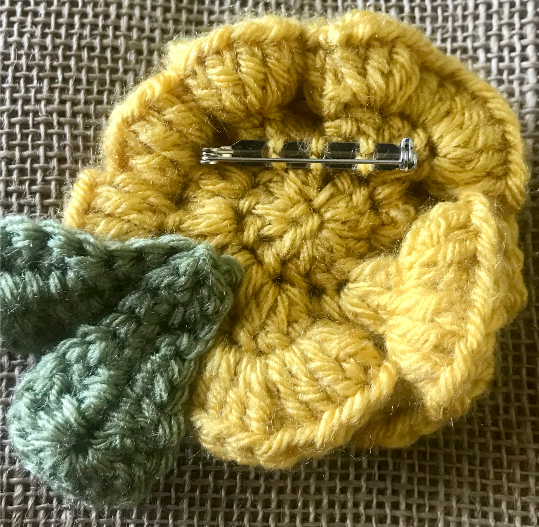
ADDING BUTTON - (& PIN IF MAKING A BROOCH)
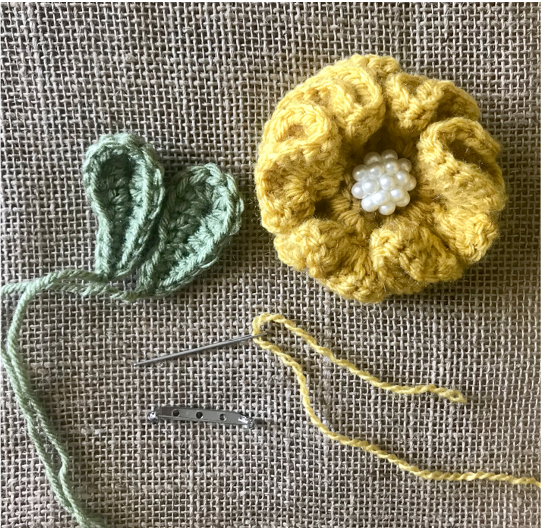
Before I stitch my button to my flower, I cut a piece of the same color yarn and then split it in half with 2 strands of yarn for each half (right photo). This gives me thread-like pieces that match the flower. I use one half to sew on the button, and if I’m adding a pin to make a flower brooch, I use the other half to stitch the pin in place (see photos below).
KDFJDFJDKFJDK
CROCHET LEAF
MAKE 1 or 2 – (I made two for each flower)
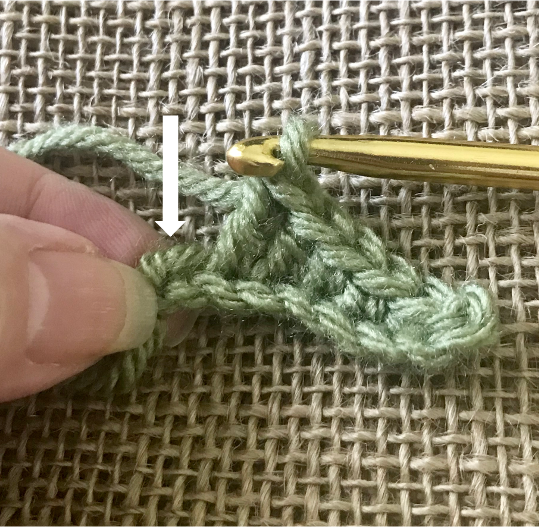
ch 8
slp st in 2nd ch from hook
sc 1 in the next 3 sts, hdc 1 in the next, dc 1 in the next
In the last st on the ch, dc 8
This will create the rounded end of the leaf
After the dc 8 is done you will now be working on the other side of the chain (right photo).
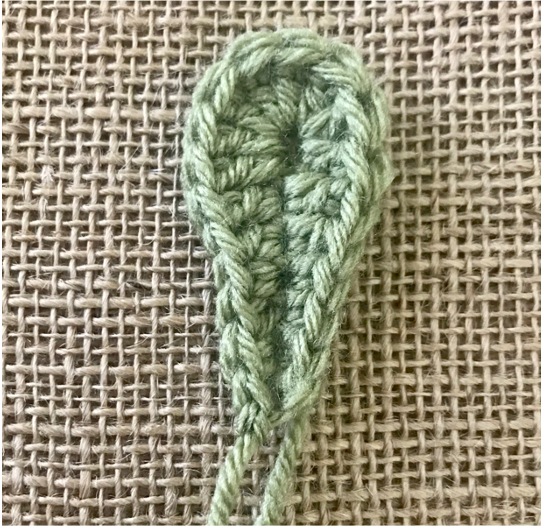
dc 1 in the next st after the dc 8, hdc 1 in the next, sc 1 in the next 3 sts, slp st in that last st.
Right photo shows a finished leaf
Tie off, weave in the beginning tail, but leave the ending tail for stitching to flower.
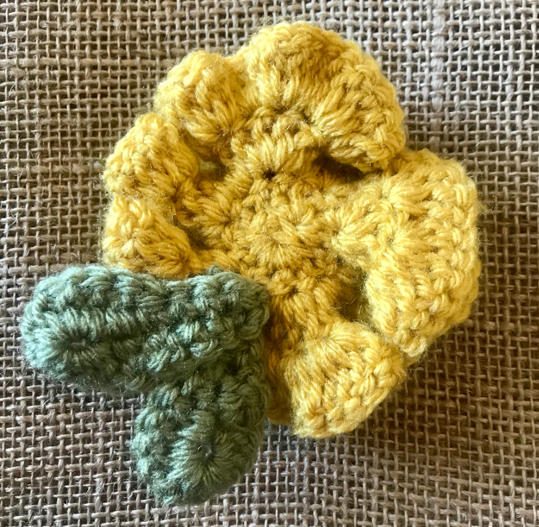
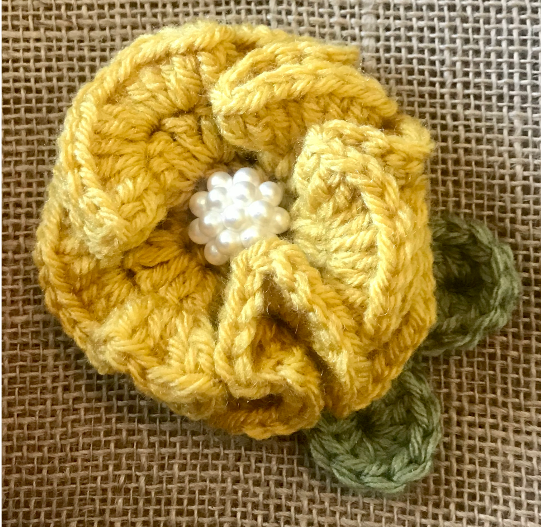
From the back side of the flower, stitch each leaf in place.
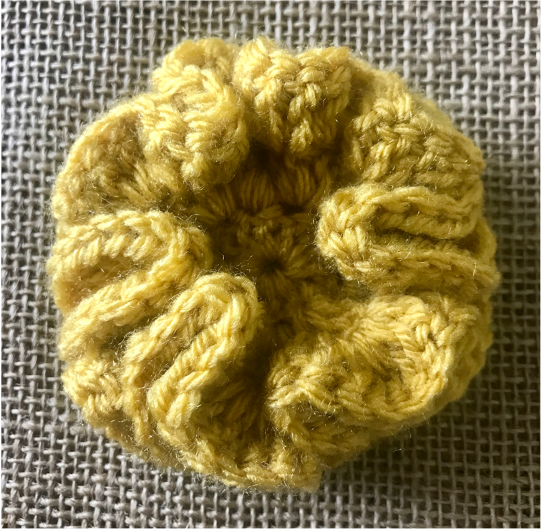
Above photo shows a finished flower with leaves.
IDEAS FOR DECORATIVE USE
#1 - FLOWER BROOCH
First, determine if you want your flower brooch to have leaves or not. Either way, with or without looks great.
If you do want the leaves, stitch those on first.
Place the pin back above the leaves and centered on the back of the flower. Stitch pin in place.
JFKDJFKDJFDKJ
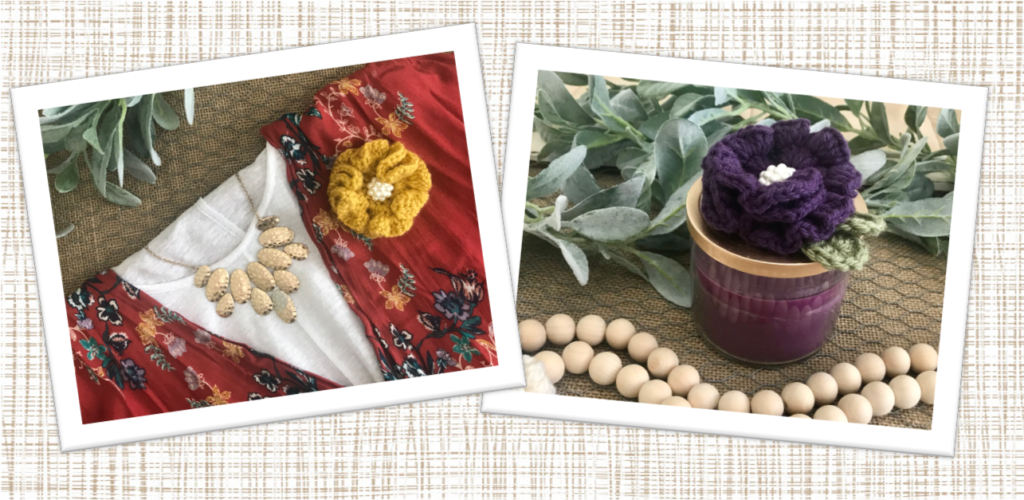
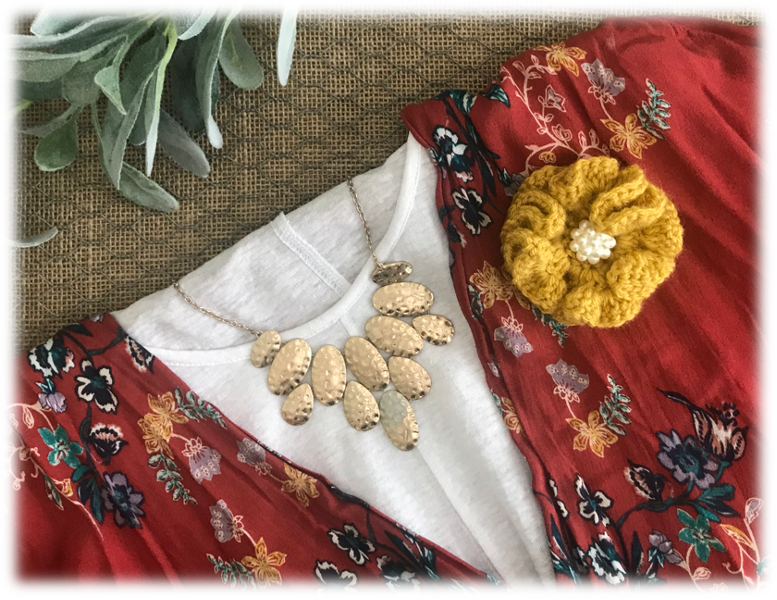
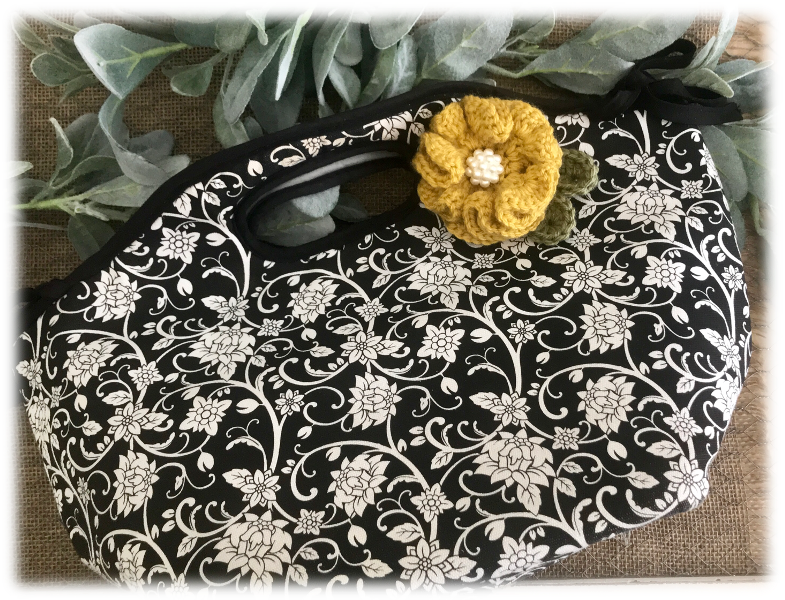
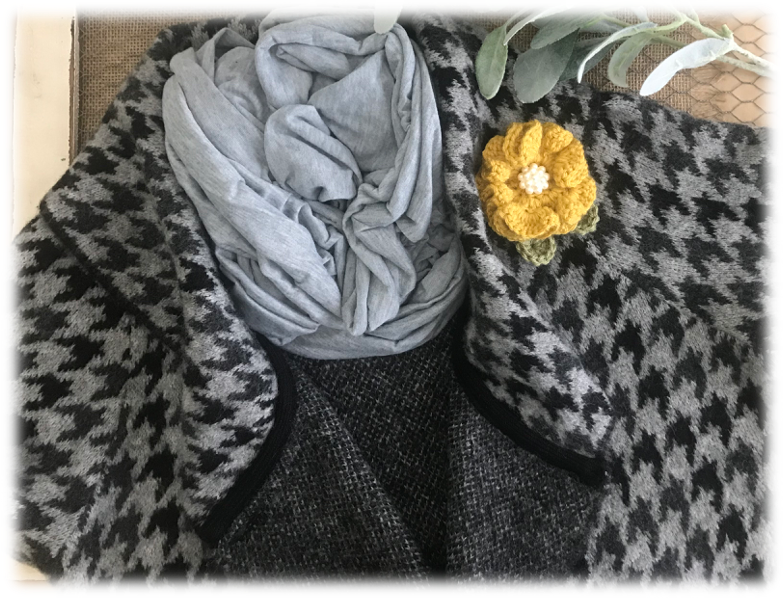
This crochet flower brooch can basically be pinned to just about anything. In the photos below I am showing it pinned to a spring outfit (without leaves), my lunch tote and my cozy winter sweater (both with leaves).
JDJFJKDFJ
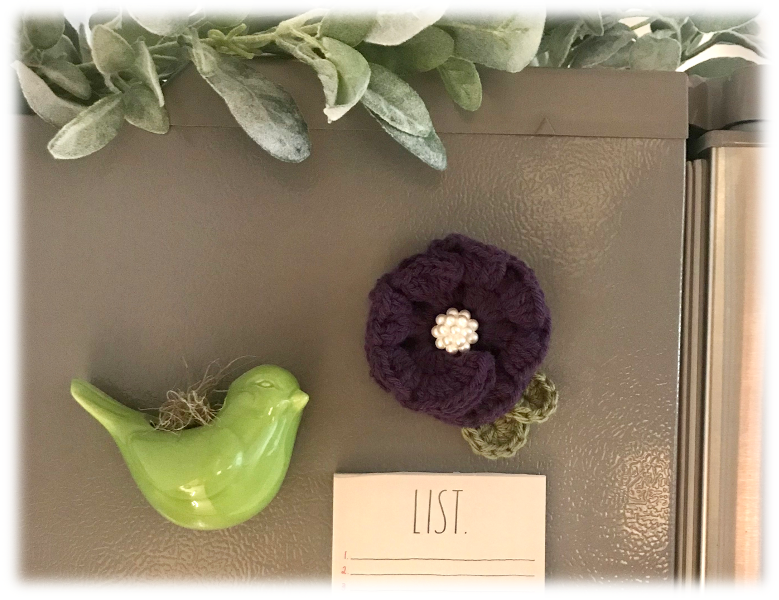
#2 - FLOWER MAGNET
Glue the magnet(s) to the back of the flower. I used three magnets because the weight of the flower was a little too heavy for it to stay in place on my refrigerator.
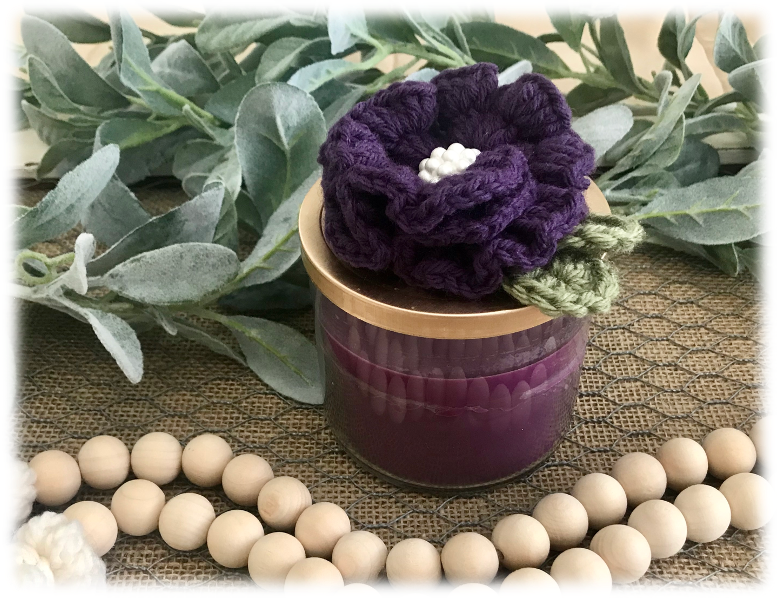
I love how the crochet flower looks as a candle lid topper (above photo).
This crochet flower magnet also looks great on a refrigerator (right photo), a metal filing cabinet, on the front of a metal soap dispenser cover, and pretty much anything that is magnetized!
JDKFJDKFJDKFJKDJF
#3 - MINI STANDING CLIPBOARD WITH FLOWER
Remove the clip from the clipboard. The clip on the clipboard I found at the Dollar Tree was very easy to remove, but left a small hole (right photo below).
SFKJDFKDJ
When I hot glued my flower to the clipboard I made sure to glue down a flower petal to cover the hole (left photo below).
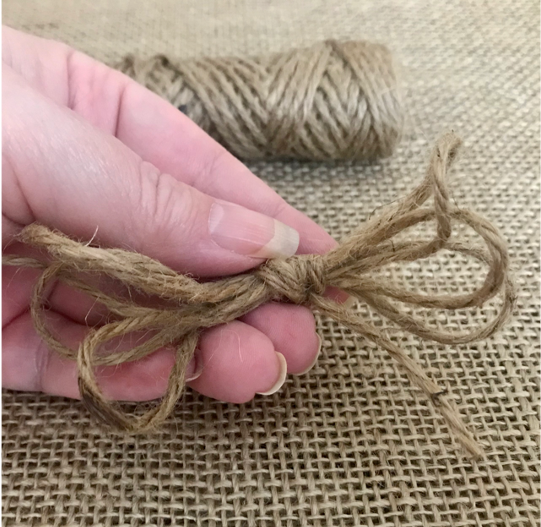
I made a bow with the jute twine (right photo below) and glued it underneath the flower and on the opposite side of the leaves.
SDJFKDJF
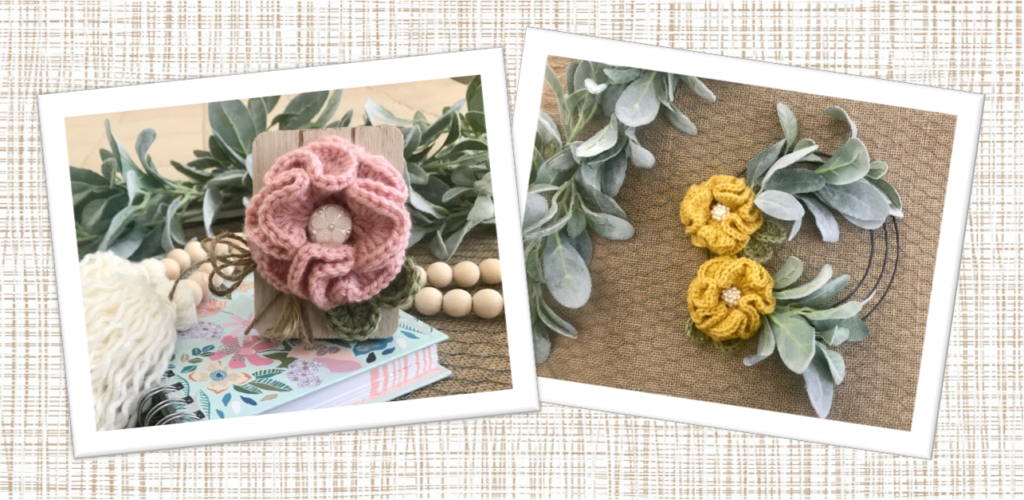
I love how cute this standing clipboard flower turned out! It’s so inexpensive and easy to make and these clipboard flowers would make a sweet gift for Bunco ladies, co-workers, girlfriends, book club friends, and all your gal pas!
Add Your Heading Text Here
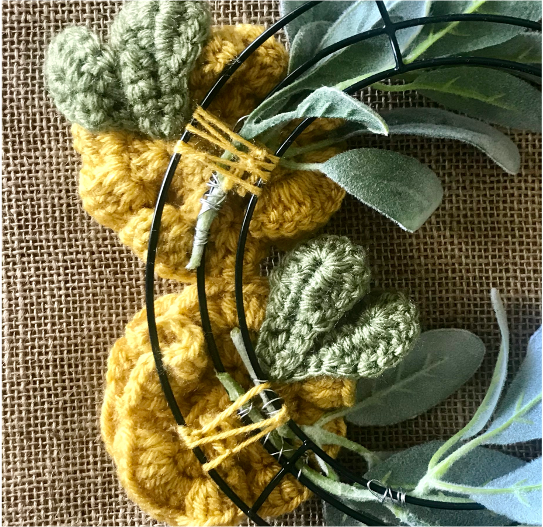
#4 - SMALL FLOWER WREATH
Take your lambs ear spray and cut it into two separate pieces (left photo below).
SKJCFKJF
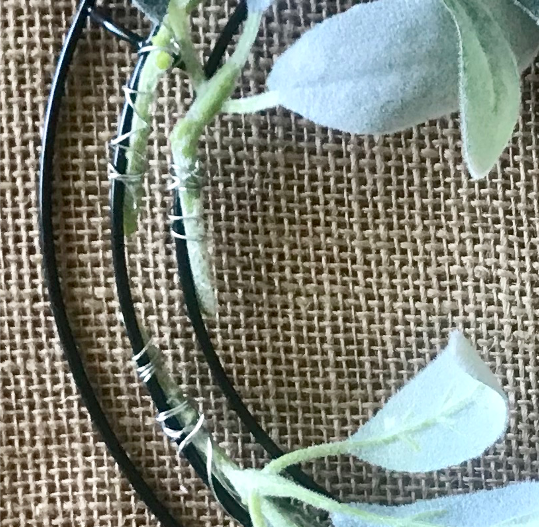
Determine where you want your leaves placed and then secure each bunch to the wire ring (see photos below).
KXJFKJFKX
With the same matching color of yarn as the flower, cut a long enough piece so it will wrap around the wire ring at least three times. I threaded my needle, ran it through the backside of the flower, then wrapped the yarn around the ring once, then knotted, twice, then knotted and a third time and double knotted (see left photo below).
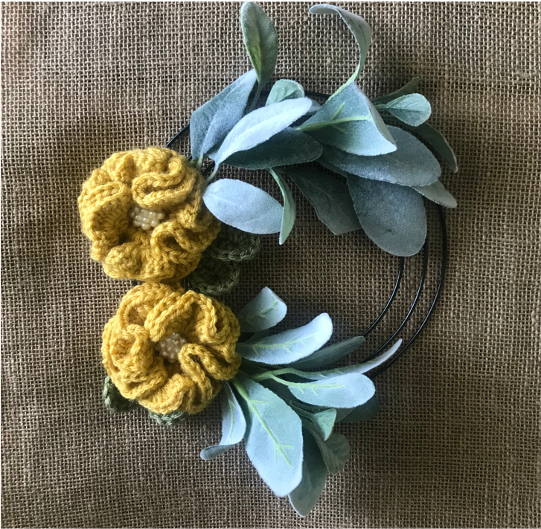
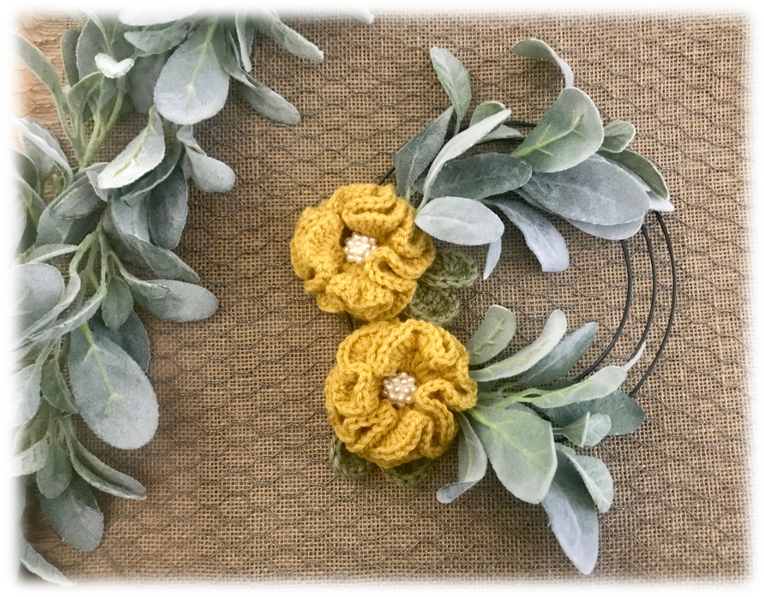
Right photo shows a finished wreath.
DJFKDJFDFJ
This cute little wreath is perfect for hanging in small places, and with a yarn color change, it can fit in with any decor! I used crochet flowers with the leaves on but it is just as cute without the crochet leaves.
Simple to make, pretty flowers that can be used in so many ways. Now that’s I project I like!
Happy Creating!
Add Your Heading Text Here
Check It Out!
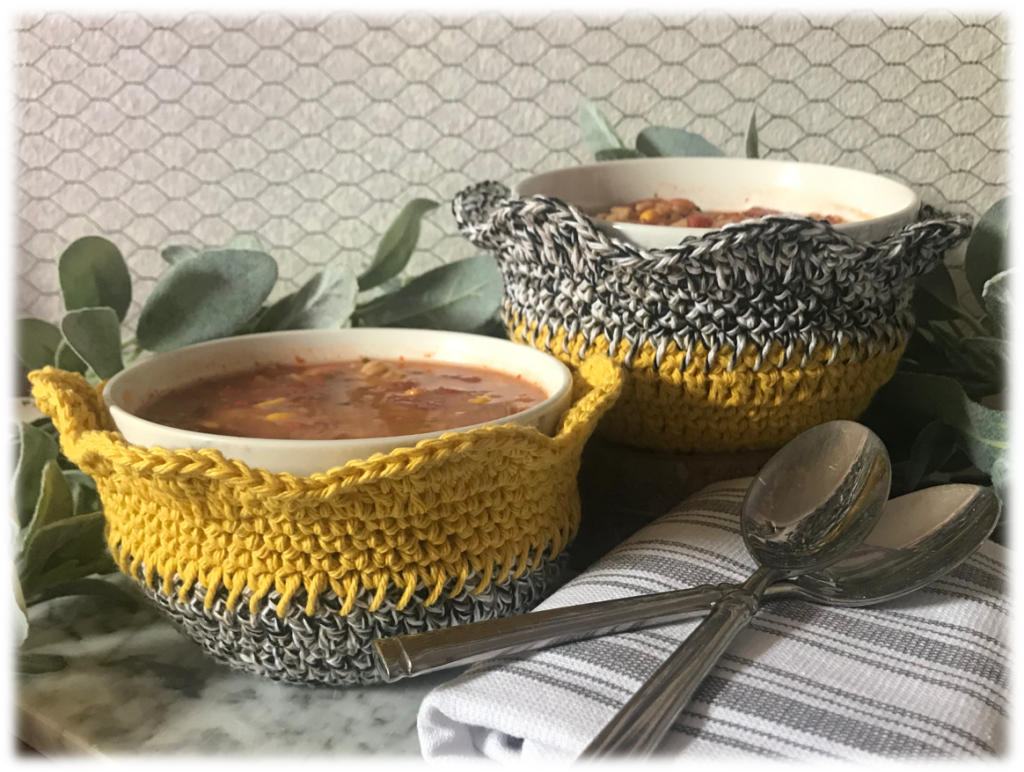
These Crochet Double Layered Bowl Cozies provide the perfect protection from extremely hot or really cold bowls. Find the free pattern here
BONUS soup recipe included with pattern
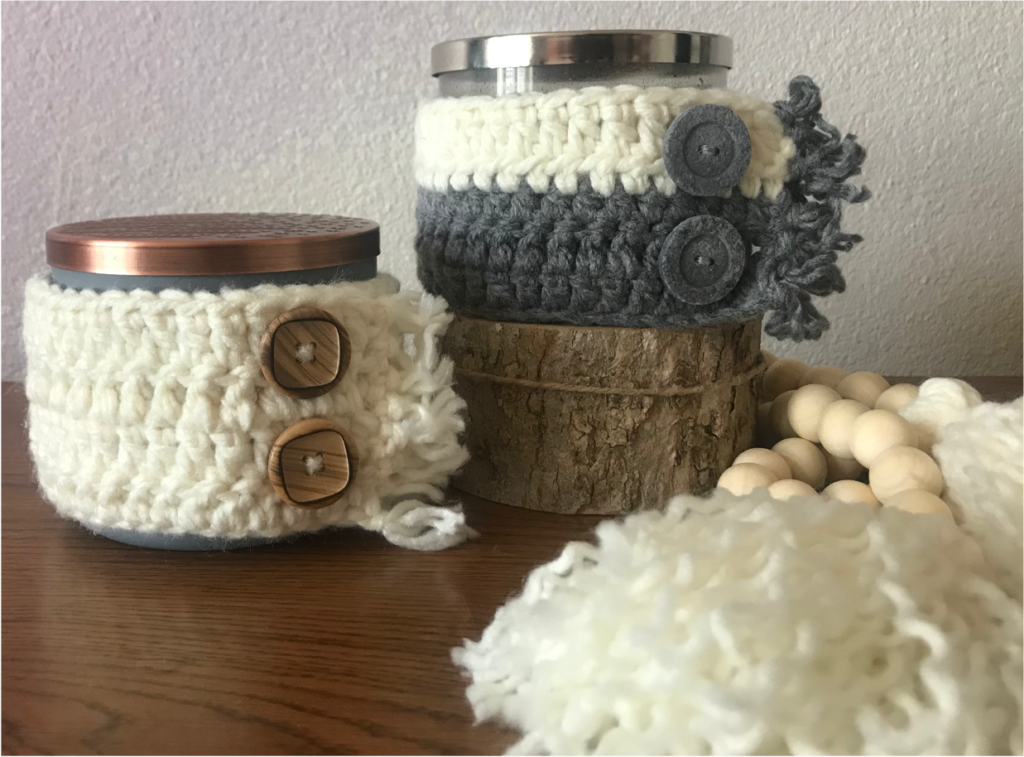
Dress up your 3-wick candles with a comfy cozy sweater-like Crochet Sweater Candle Cozy! Find the free pattern here
kljkljlklklkj
Contact
I would love to hear from you! Feel free to leave me a comment below, use the ‘Contact Me’ section on the top menu bar and leave a comment there, or email me directly at mypassionatesoul123@gmail.com.
Subscribe
All subscribers welcome! If you would like to stay current and receive email updates with the latest My Passionate Soul news, alerts to new FREE patterns, exciting giveaway info and more, you can sign-up at the ‘Subscribe’ section of the sidebar menu. I promise you will never receive any spam, just yarn news and other crafty stuff!
***I put a lot of labor, love and time into the design of my patterns and create them for personal use only. Please do not sell my patterns and claim them as your own. Feel free to make and sell items you’ve made from my patterns, but if you do I ask that you link directly back to my post or blog and provide the link. You may also share my patterns on social media as long as you, again, link directly back to my post or blog and provide the link. Please do not copy and paste my patterns and claim them as your own. If selling items made from my patterns I ask that you use your own photos and do not re-publish any photos related to my patterns as your own. Thank you for your understanding.***


Leave a Reply