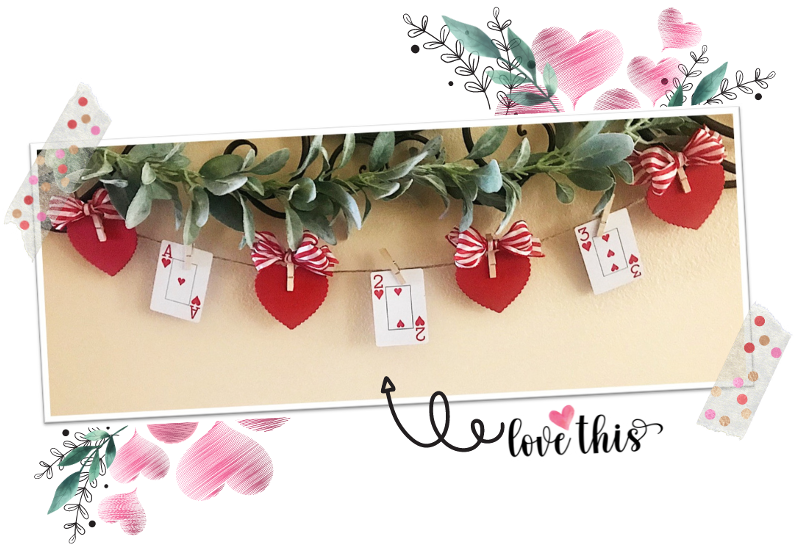
This DIY Valentine garland is literally so simple and fast to make you may find yourself making more than one. I like a quick project and this one definitely falls under the less-than-30 minutes category. Yes! You can find the FREE instructions with photos below.
Add Your Heading Text Here
INSPIRATION
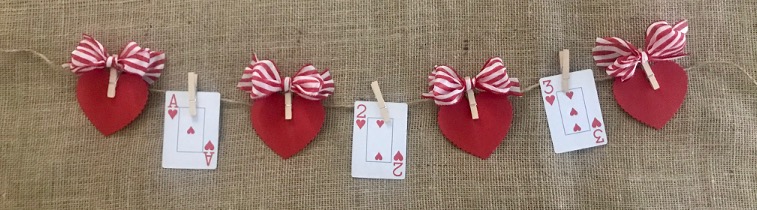
We recently had a family game night and decided to play a card game. As I was playing my hand, that happened to have quite a few hearts, the thought hit me that a Valentine project would really be fun using the hearts from a deck of cards. I wanted something quick and easy and came up with this cute heart garland! It adds a cute and unique touch to my Valentine decor. I love it!
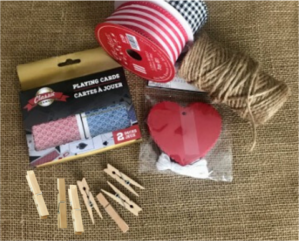
PROJECT MATERIALS
DECK OF CARDS (or 3 Heart playing cards from a deck)
I found a 2-pack at our local Dollar Tree
NOTE: I chose the Ace, 2 & 3 of Hearts from my deck but you can choose any combination of heart cards that you like.
CARDSTOCK (STURDY) PAPER HEARTS (8)
The hearts I used are 3.25″ wide with scalloped edges and I found them at Hobby Lobby.
1.75" CLOTHESPINS (7)
You can find these at any craft store
JUTE TWINE
I used jute twine for my hanging string but you can use rope, sturdy string or a thicker yarn too. Something sturdy enough to hold the weight of the clothespins.
DECORATIVE RIBBON (1 SPOOL)
I used two leftover spools of red and white stripped ribbon that I used at Christmas. You can also find really cute Valentine ribbon at Michaels, JoAnn’s, Hobby Lobby or any other craft store. My ribbon is 1.5″W but 1″W will work too.
PENNIES (4)
Because the paper hearts are lightweight and the clothespins are heavier, the hearts tend to be too flimsy hanging on the string and will tip upside down. I used 2 paper hearts and 1 penny for each hanging heart so they would hang much straighter once they are clipped to the string.
ADDITIONAL NOTIONS
Glue Gun Scissors Tape (I used double-stick tape) Tape Measure
PROJECT MEASUREMENTS
Cut your hanging string (I used jute twine) approximately 37″ long, leaving about 6″ on each side for hanging.
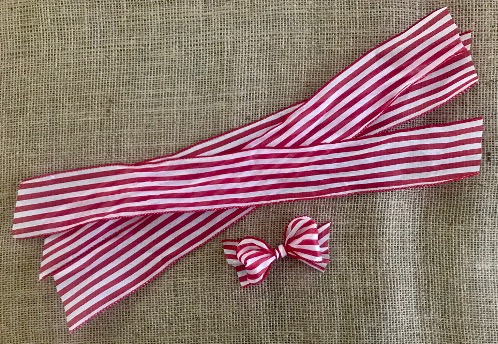
I cut 4 – 18″L pieces of ribbon, then tied each piece into a bow.
NOTE: I cut each end of my bow fairly short so when the bow is glued to the clothespin the width of the bow is even with the paper heart without a lot of ribbon overhang on either side.
INSTRUCTITONS
1. Make 4 separate bows with your decorative ribbon, then hot glue each bow to a clothespin. The photo on the right shows that I glued the bow pretty high up on the clothespin. If the bow is too low it will cover up too much of the paper heart once it’s pinned to the hanging string.
Add Your Heading Text Here
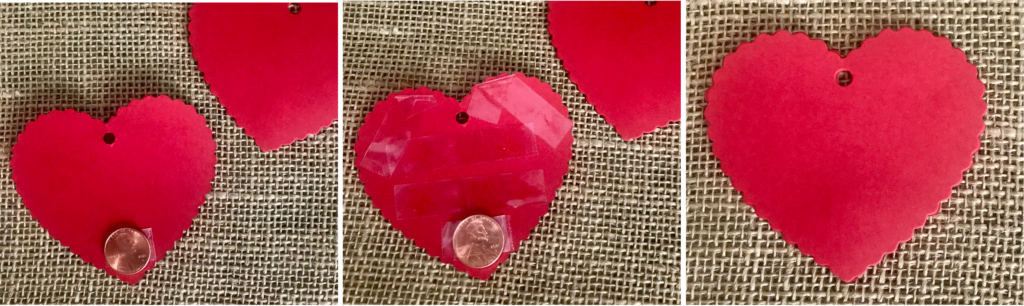
2. Take 2 paper hearts and one penny plus the tape.
Lay one heart flat and tape the penny at the point of the heart (left photo below).
Put strips of tape to cover the heart and on strip across the top of the penny (middle photo below).
Place the 2nd paper heart on top of the first heart with the penny, lining the edges up evenly with each other, and press both hearts together, making one heart for hanging (right photo below).
Repeat with the other 3 paper hearts.
Add Your Heading Text Here
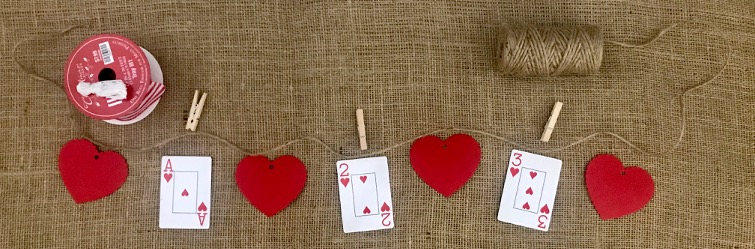
3. Cut your piece of hanging string at 37″L and lay it stretched out in front of you.
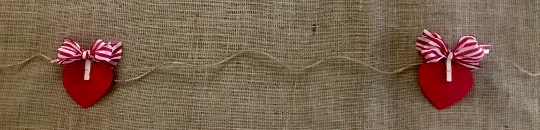
Starting from the left side of the hanging string come in 6″ and clothespin your first two-piece paper heart to the string. Then come in 6″ from the right side and clothespin a two-piece paper heart there (see photo below).
Add Your Heading Text Here
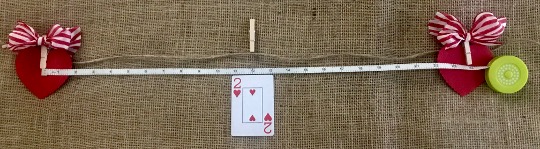
4. Measure the distance between each clothespin and place your middle Heart playing card there. My space measured 24″ between clothespins and I placed my Heart playing card at 12″. The Heart playing cards I chose are Ace, 2 & 3, so I placed the 2 of Hearts at the 12″ mark (see photo below).
Add Your Heading Text Here
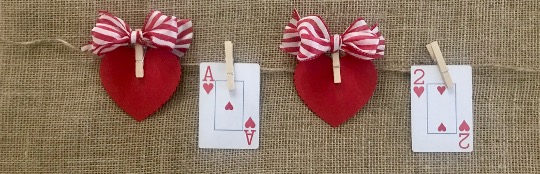
5. On the left side of your garland between the first two-piece paper heart clothespinned to the hanging string and the Heart playing card pinned in the middle of the hanging string, evenly place your first Heart playing card of your sequence (mine is an Ace) and another two-piece paper heart next to that (see photo below).
Repeat on the right side of your garland.
Add Your Heading Text Here
Ta da! There you have it…a super simple DIY project that is done in less than 30 minutes. And it’s SO cute too!!
Add Your Heading Text Here
Happy Creating!
Add Your Heading Text Here
Check It Out!
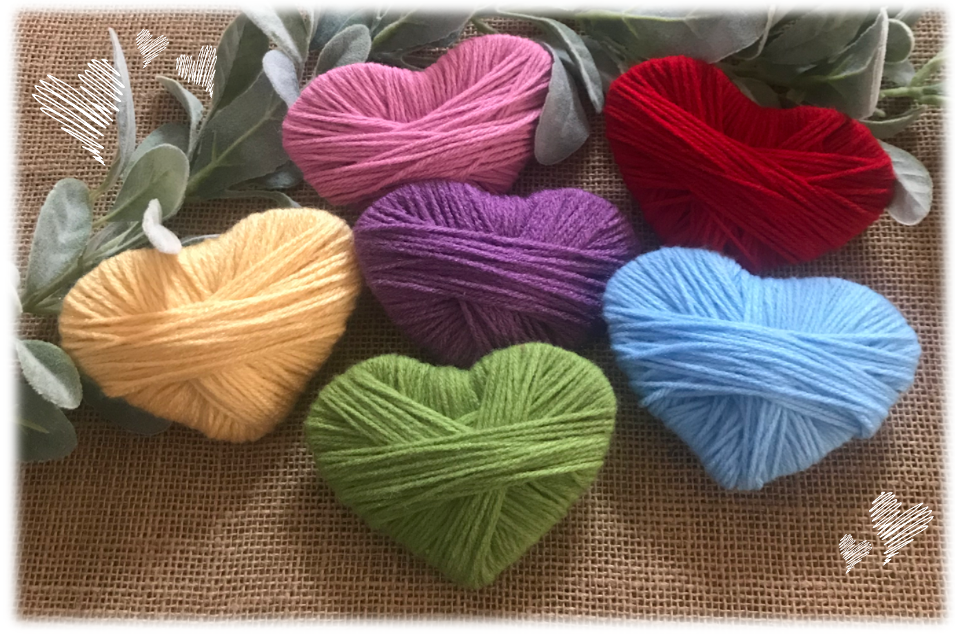
Say “I Love You” with these DIY Valentine Yarn Hearts! Find the free pattern + yarn heart project ideas here
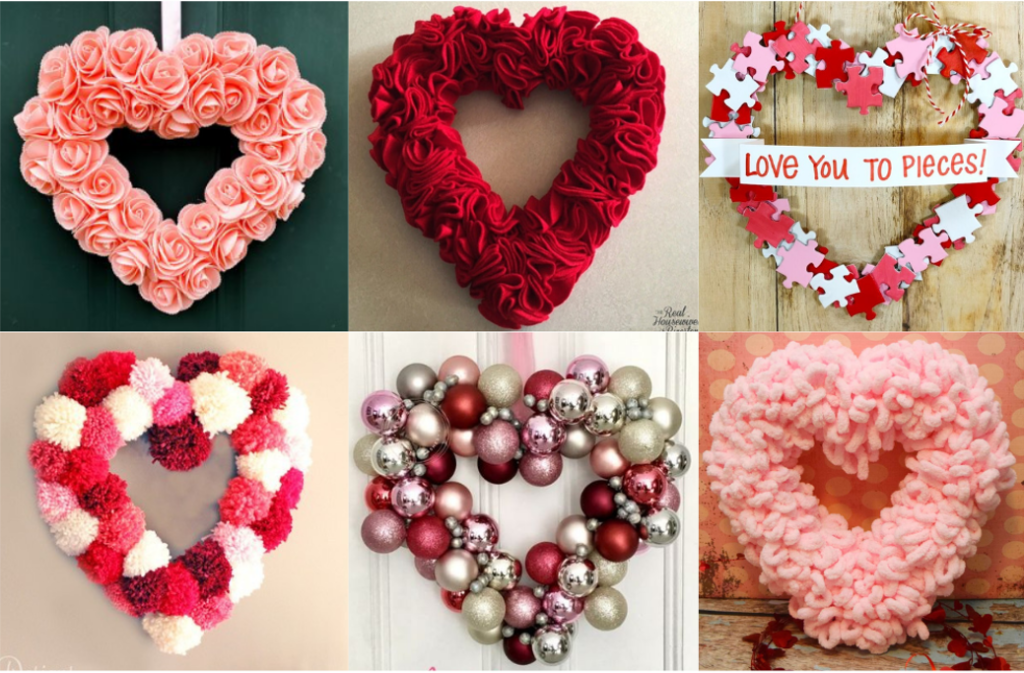
Get inspired to make your own DIY Valentine wreath with several free patterns listed on the blog here
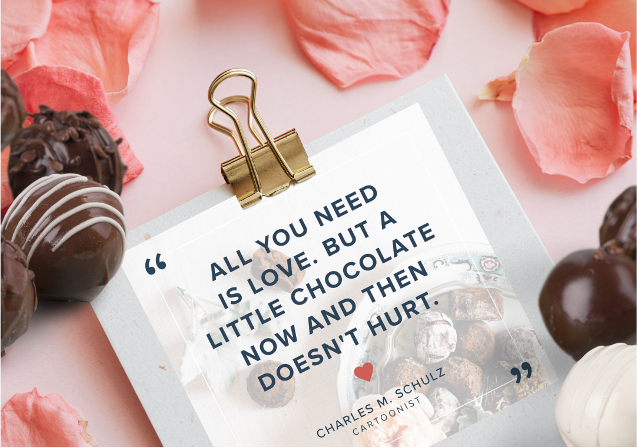
It’s Super Bowl time and that means chips & guacamole time! Find the recipe for this total tasty Easy Peasy Guacamolehere
kljkljlklklkj
Contact
I would love to hear from you! Feel free to leave me a comment below, use the ‘Contact Me’ section on the top menu bar and leave a comment there, or email me directly at mypassionatesoul123@gmail.com.
Subscribe
All subscribers welcome! If you would like to stay current and receive email updates with the latest My Passionate Soul news, alerts to new FREE patterns, exciting giveaway info and more, you can sign-up at the ‘Subscribe’ section of the sidebar menu. I promise you will never receive any spam, just yarn news and other crafty stuff!
***I put a lot of labor, love and time into the design of my patterns and create them for personal use only. Please do not sell my patterns and claim them as your own. Feel free to make and sell items you’ve made from my patterns, but if you do I ask that you link directly back to my post or blog and provide the link. You may also share my patterns on social media as long as you, again, link directly back to my post or blog and provide the link. Please do not copy and paste my patterns and claim them as your own. If selling items made from my patterns I ask that you use your own photos and do not re-publish any photos related to my patterns as your own. Thank you for your understanding.***


Leave a Reply