You don’t need any crochet skills to make these fun DIY Valentine Yarn Hearts. They work up quickly and the best part… they don’t have to be made perfectly! Follow the EASY directions below and make up a set for yourself and then gift a set to someone special!! Find the FREE directions below, plus assembly directions for the Decorative Yarn Heart Garland, Decorative Single Yarn Heart Dangle and Decorative Four Yarn Hearts Dangle.
INSPIRATION
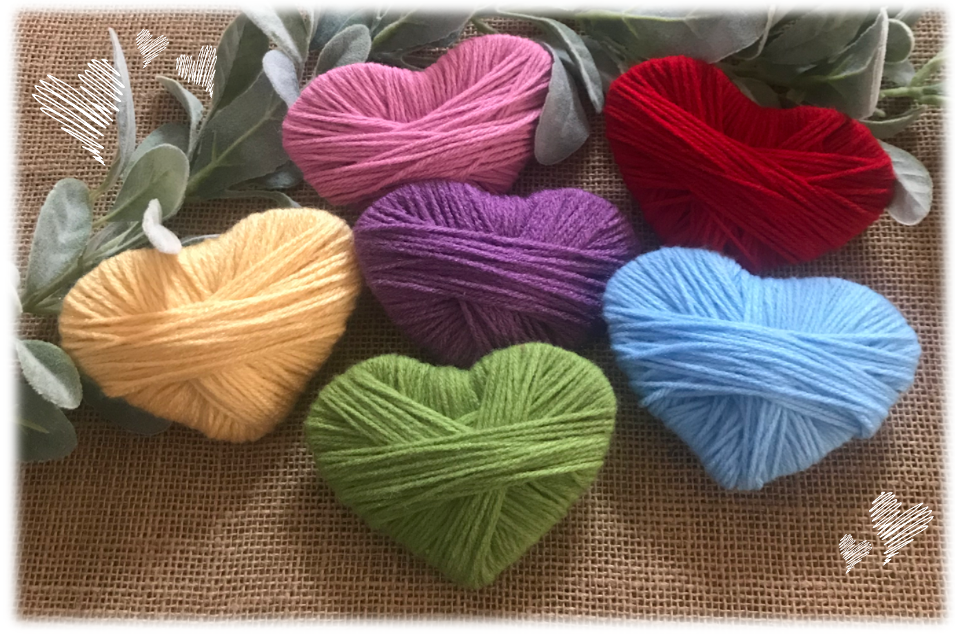
As I was putting away my Christmas decor I automatically started thinking about the next holiday I wanted to decorate for. If you are anything like me, I try to decorate my home for all the big holidays and Valentine’s Day is next on the calendar. Hearts it is! With the easy to follow directions, these Valentine Yarn Hearts truly do work up so quickly and they make cute doorknob dangles, garland, attach them to a greenery wreath, or they are even fun sitting in a basket or tray, or scattered like heart confetti. I have included the printable heart template I used, but you can easily google ‘heart outline template’ and find a pattern as big or a small as you like. These Valentine Yarn Hearts can also be used to make an adorable garland for a girls room, just match yarn colors to the room decor. So fun!
PROJECT MATERIALS
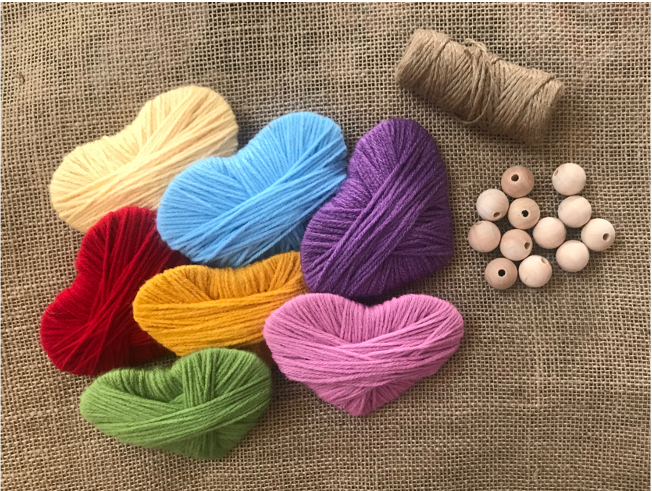
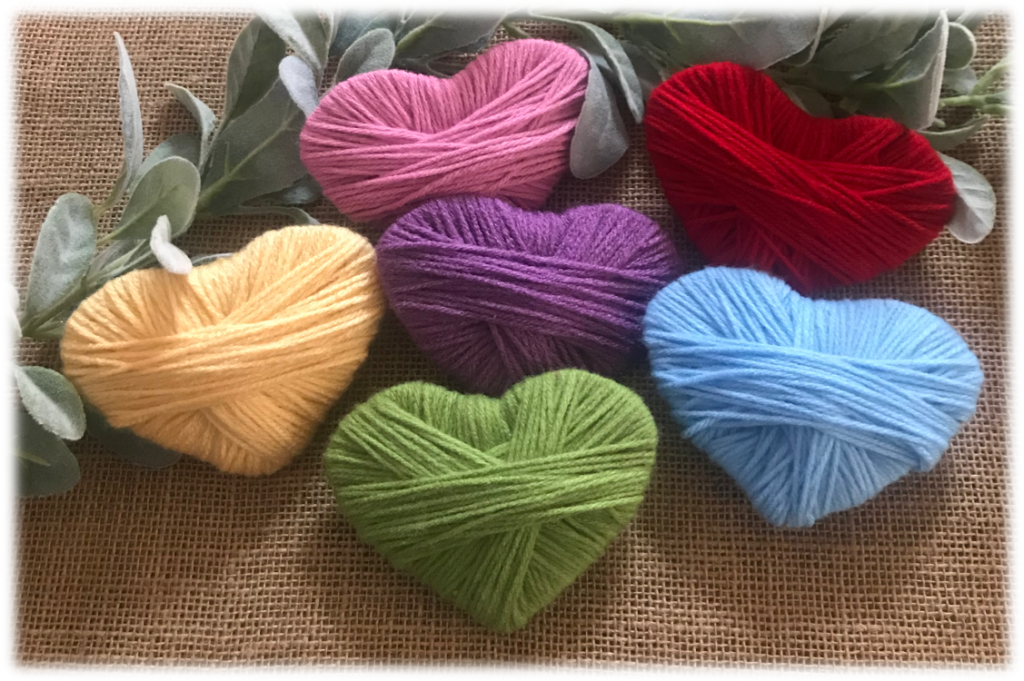
YARN - I suggest any or all of the following:
Red Heart Super Saver Yarn in 1) CHERRY RED, 2) CORNMEAL, 3) LIGHT PERIWINKLE, 4) TEA LEAF, 5) LIGHT RASPBERRY, 6) GOLD, 7) LAVENDER Medium 4 / 100% Acrylic/ 364 yrds Partial skein each color
NOTE: I chose yarn colors from used skeins in my yarn stash
OPTIONAL – Red Heart Super Saver Yarn in WHITE (if making a tassel) Medium 4 / 100% Acrylic/ 364 yrds Partial skein or used skein from yarn stash
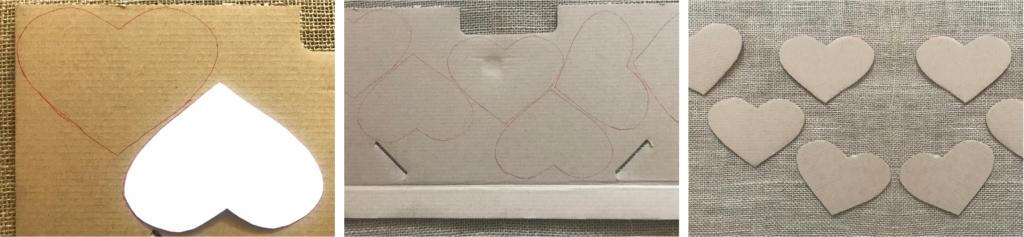
Using a scrap piece of corrugated cardboard and the heart template cutout, trace as many hearts across the cardboard as you plan to make, then cut out each heart (see photos below). I used a cardboard insert from an Amazon shipping box. The actual sides or flaps of the box will work well too.
Add Your Heading Text Here
WINDING YARN AROUND CARDBOARD HEART
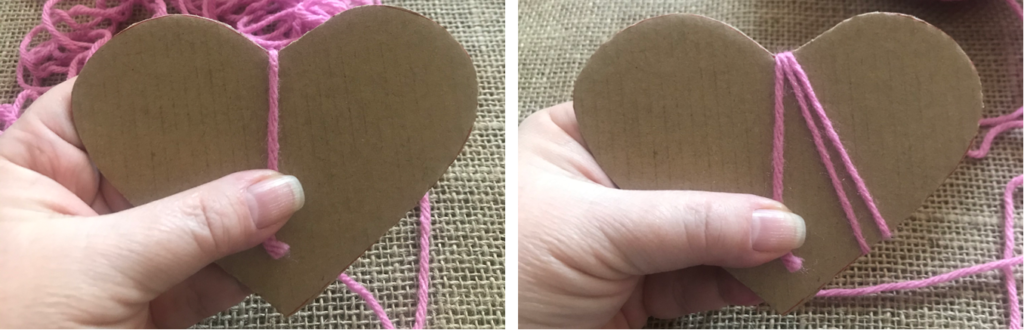
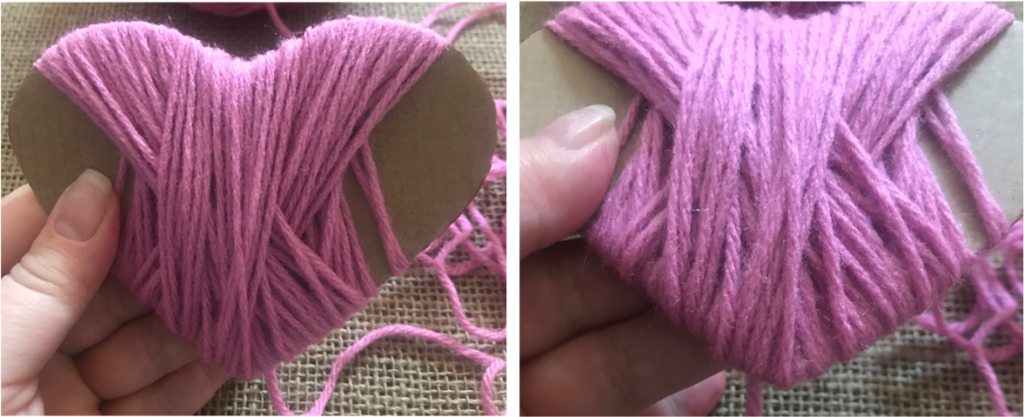
Take the first cardboard heart and start winding the yarn around and around covering the arched, top part of the heart first (follow photos below). Pull snuggly as you wind the yarn around, but not so tight that you bend the cardboard. You want the yarn to stay snuggly in place and not become too loose causing it to come off the cardboard.
Add Your Heading Text Here
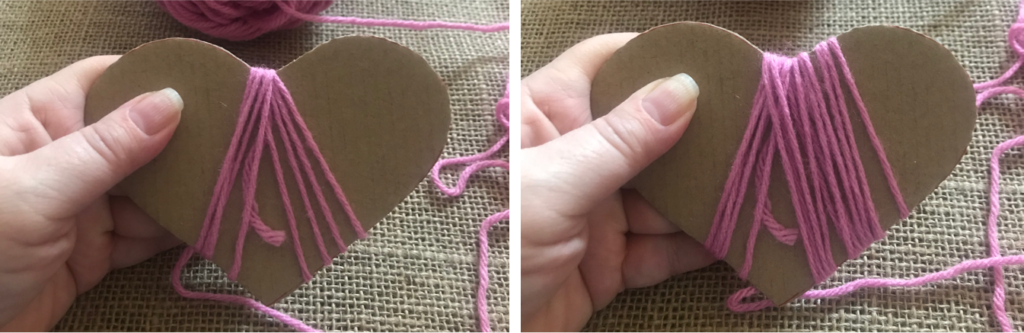
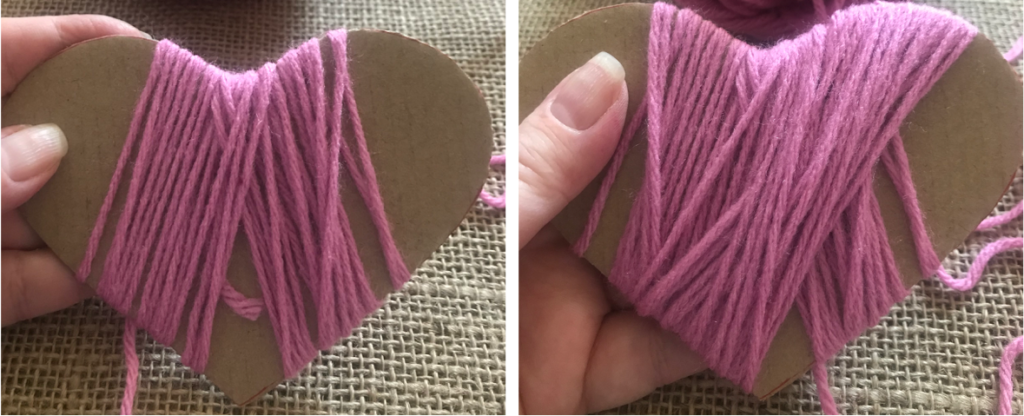
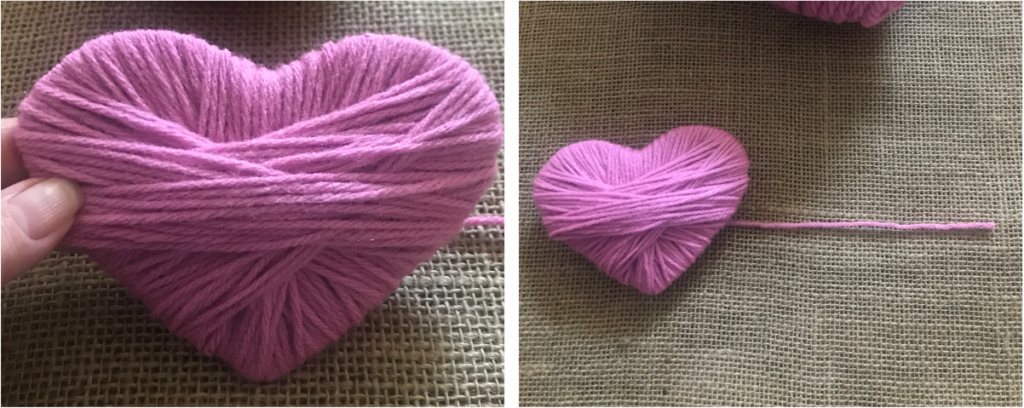
After you have covered the top, arched part of the heart start winding the yarn around each side, then straight across from side to side (see the first 3 photos below). When the heart is totally covered, cut the yarn leaving a tail for tying off (see 4th photo).
Add Your Heading Text Here
TYING-OFF THE YARN TAIL
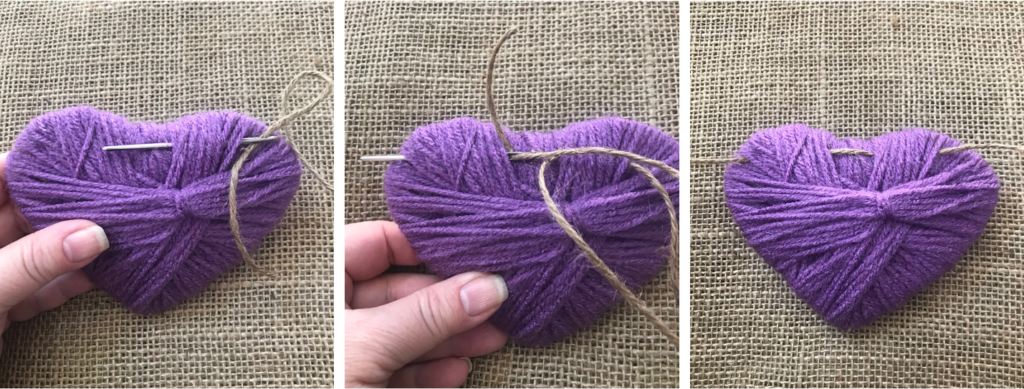
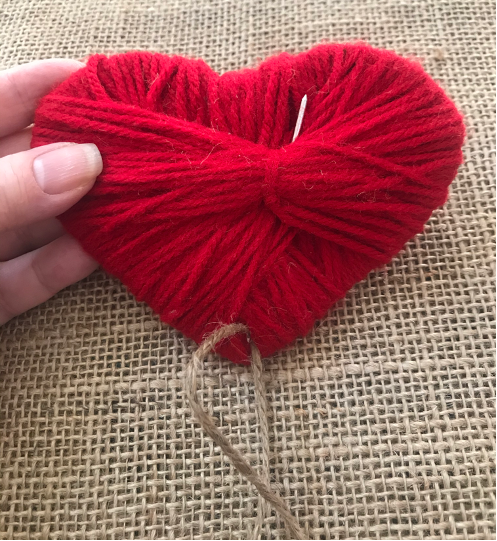
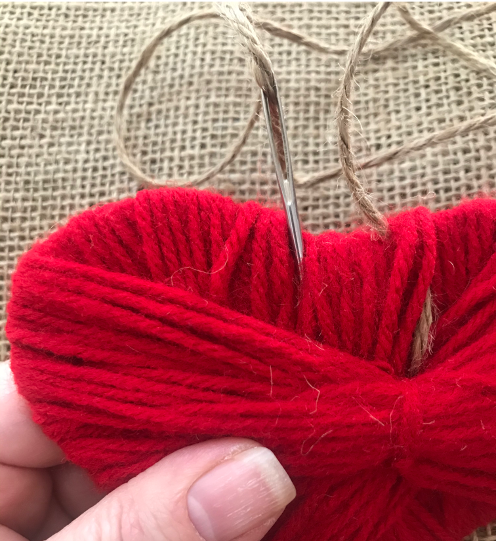
Thread your needle with the yarn tail and from the backside of the heart, push the needle underneath and through the straight across, middle yarn section of the heart (left photo), then pull the yarn tightly to secure the yarn (right photo).
Add Your Heading Text Here
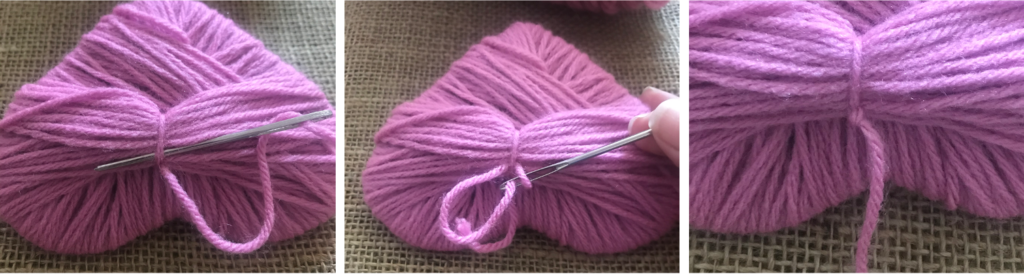
Push the needle through the tightened yarn (left photo), then bring the needle back around and through the loop you just created (middle photo). Pull tightly to create a knot (right photo).
Add Your Heading Text Here
Push the needle through the backside yarn toward the bottom point (left photo). Remove the needle from the yarn and with the eye side of the needle push and tuck in any remaining tail (right photo).
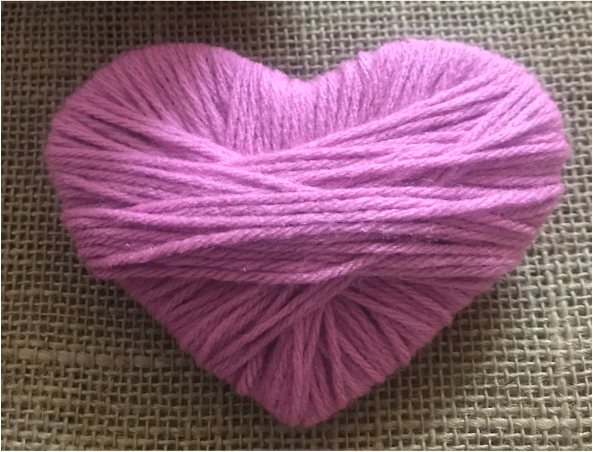
Left photo shows one complete yarn heart. Make three more for a 4 Heart Yarn Dangle, and 6 more for a Yarn Heart Garland.
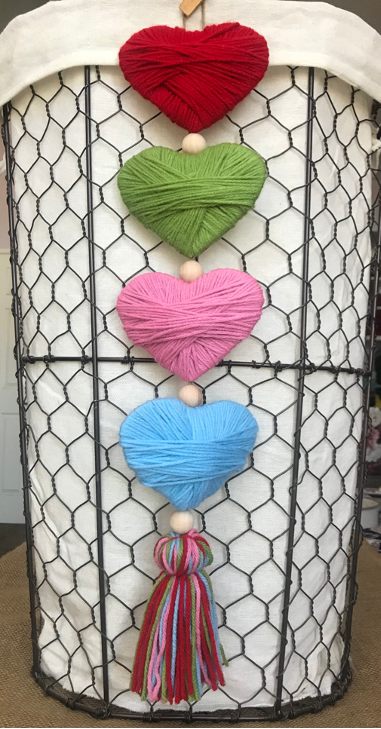
DECORATIVE YARN HEART GARLAND Assembly
Supplies: 7 yarn hearts, twine, 12 wood beads
ATTACHING YARN HEARTS & BEADS TO GARLAND TWINE
Cut a piece of jute twine about 80″L and then thread your needle with the twine.
Take your first yarn heart and from the backside of the heart insert the threaded needle through the top, right side of the heart (left photo).
Thread the needle through the left section at the top of the heart and push the needle out the left side of the heart (middle photo).
NOTE: The jute twine has a bit of a rough texture so you will want to gently pull the twine through the yarn so that it doesn’t fray the yarn.
Pull the twine gently out the top left side of the heart, then gently push the heart to the right putting it in place as the first heart on the twine (right photo). Leave about 10″ – 12″ of twine on the right side of the heart to be used for hanging.
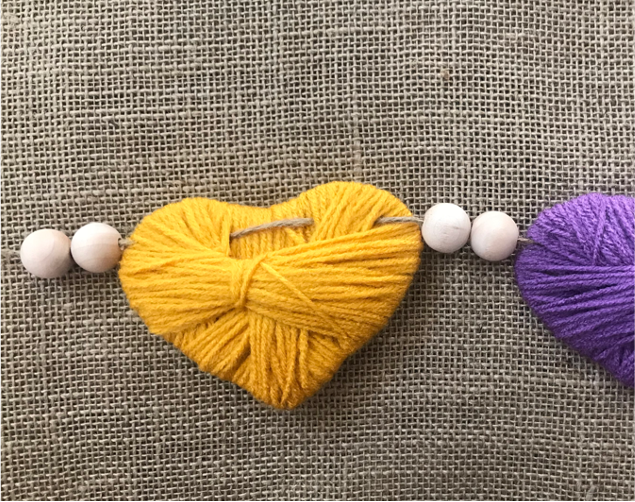
Thread the twine through two wood beads and push them next to the first yarn heart (left photo).
Repeat this process (right photo), until the remaining yarn hearts and wood beads have been strung on the twine.
You will want to leave about 10″ – 12″ of twine on the left side of the last heart to be used for hanging.
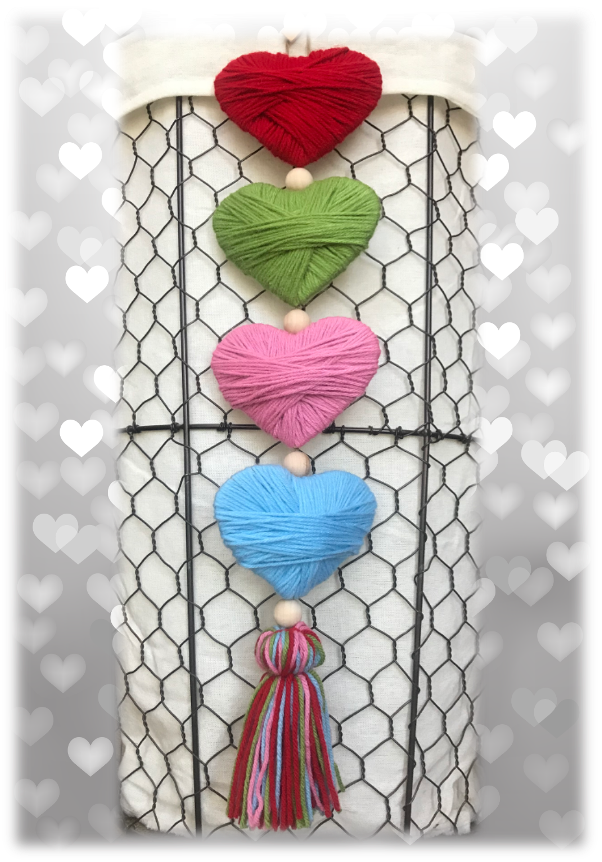
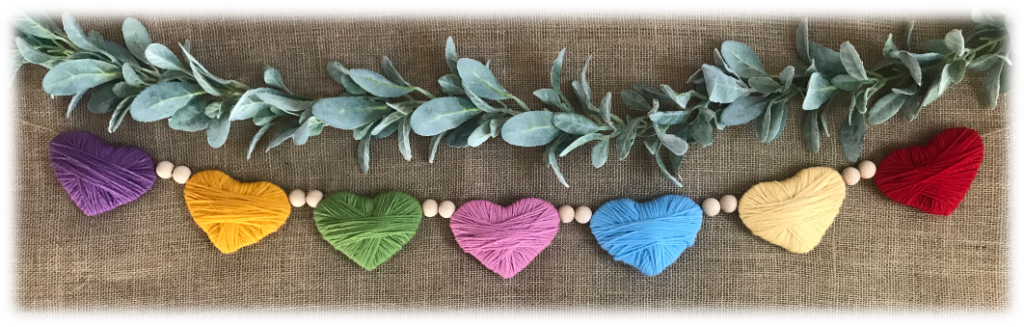
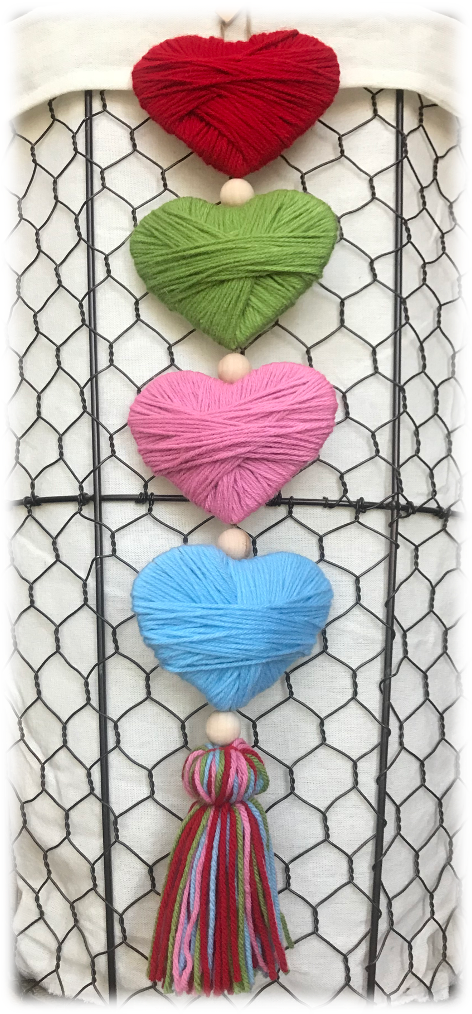
This DIY Valentine Yarn Heart Garland is so cheery and festive, and the colors remind me of vintage Sweetheart candies, perfect for Valentine’s Day!
DECORATIVE
SINGLE
YARN HEART
DANGLE
Assembly
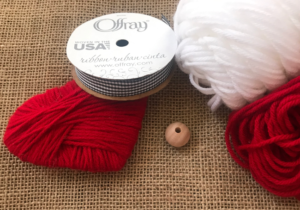
Supplies: 1 yarn heart, ribbon, 1 wood bead, skein of yarn that was used for heart, skein of white yarn
ATTACHING RIBBON TO YARN HEART
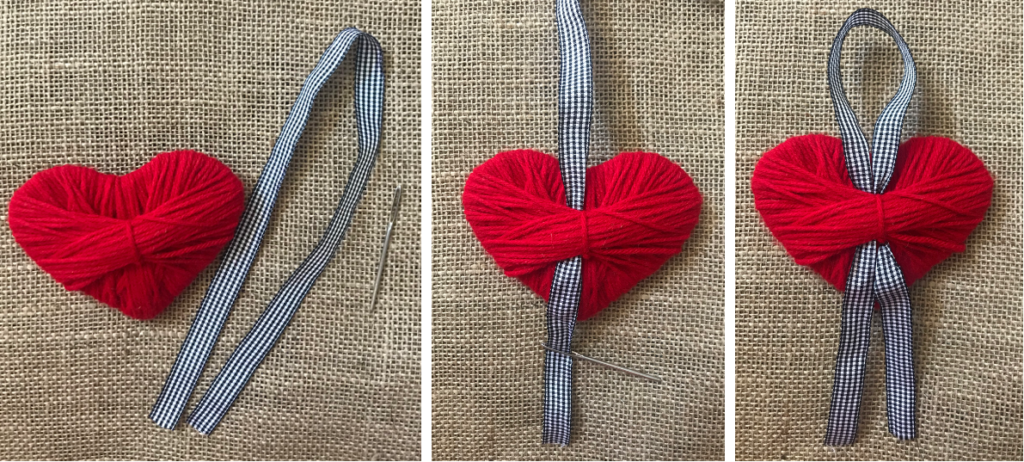
Cut a 20″L piece of ribbon, then thread your needle with one end of the ribbon.
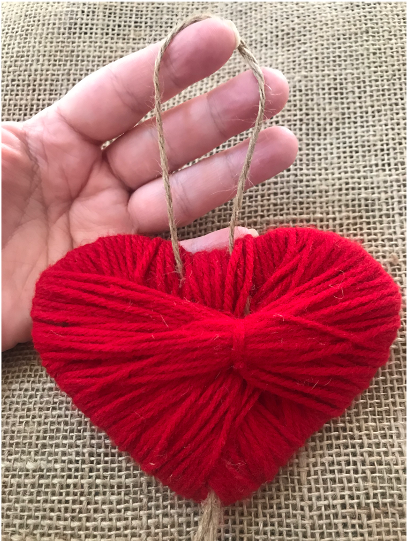
Working from the backside of the yarn heart, insert your threaded needle down from the top of the heart through the middle section of the heart and down past the point of the heart leaving about a 2 1/2″ – 3″ tail of ribbon coming from the bottom (middle photo).
Thread the other end of the ribbon and bring it down through the top of the heart, through the middle section and down through the point of the heart.
NOTE: As your are pulling your threaded needle through the middle section, leave enough ribbon at the top to make a loop for hanging (right photo).
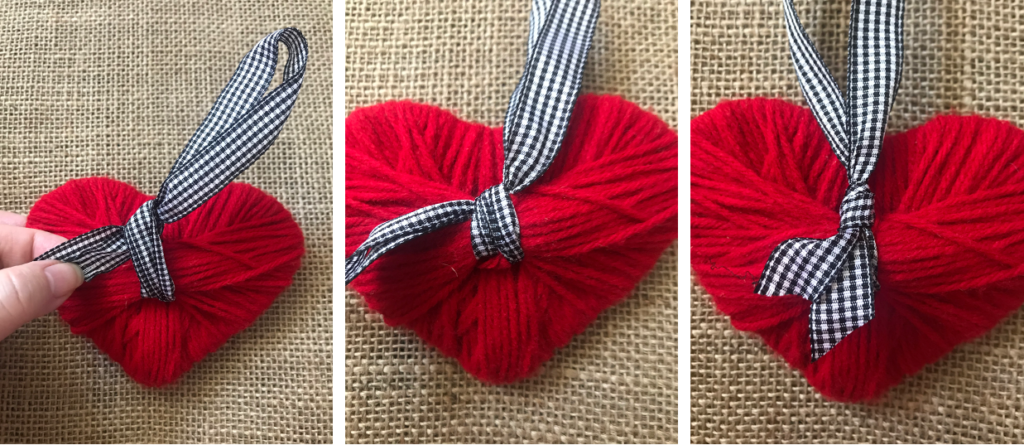
Bring the bottom tails of the ribbon up to the middle section of the heart where the loop starts and tie and knot the ribbon in place right at the middle section. Cut off any extra tails (see photos below).
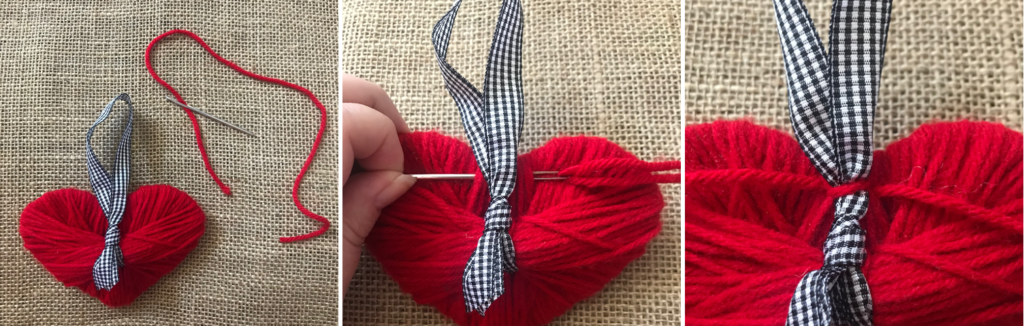
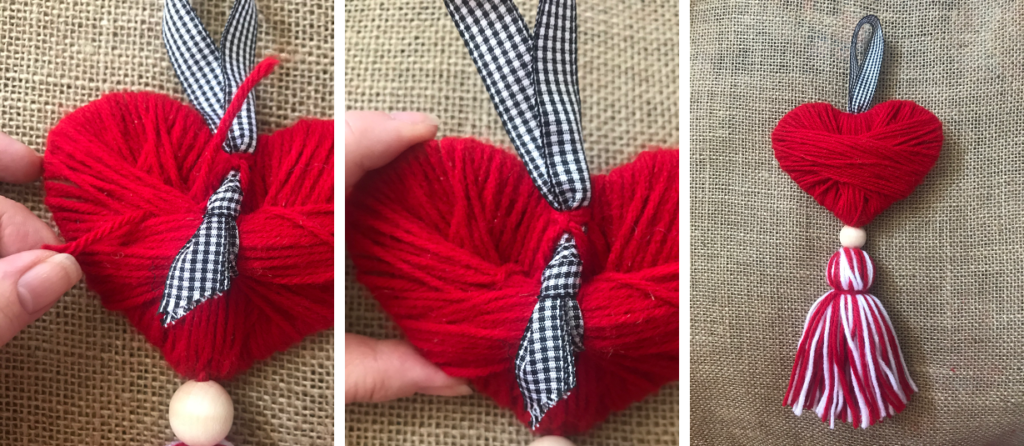
With the same color yarn as the heart, cut about a 12″ piece and then thread your needle (left photo).
Insert your needle through a small section of yarn up toward the top middle of the heart just above the ribbon knot (middle photo).
Tie and knot the piece of yarn around the ribbon to hold it secure and keep the heart from flopping forward when hanging (right photo).
With the non-threaded eye end of your needle, push and tuck the yarn tails down into the middle section of yarn.
MAKING AND ATTACHING THE TASSEL
Cut a scrap piece of corrugated cardboard about 3 1/2″ wide x 5 1/2″ tall.
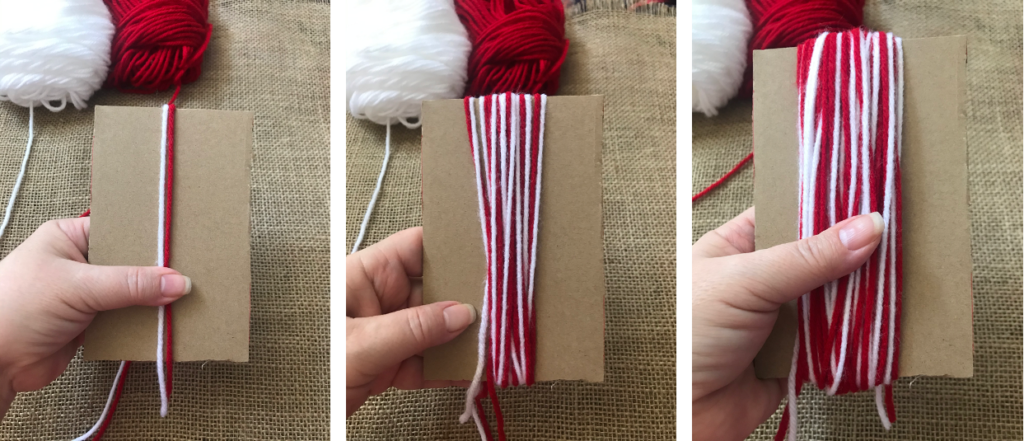
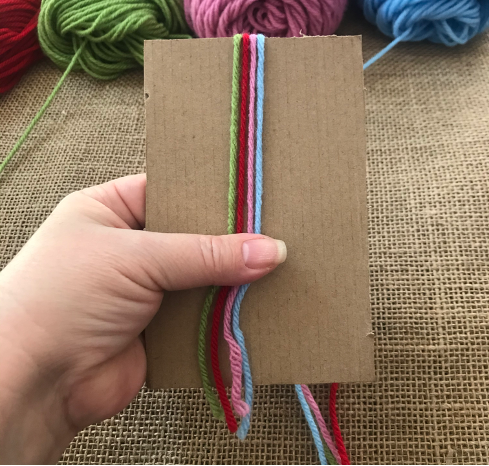
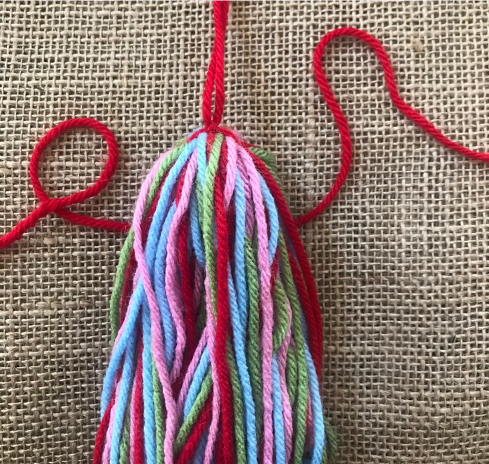
Using the same color of yarn as the heart, plus white yarn, layout both skeins of yarn in front of you, then line up each end of yarn and drape both strands over the top of the cardboard, holding the yarn in place with your thumb (left photo).
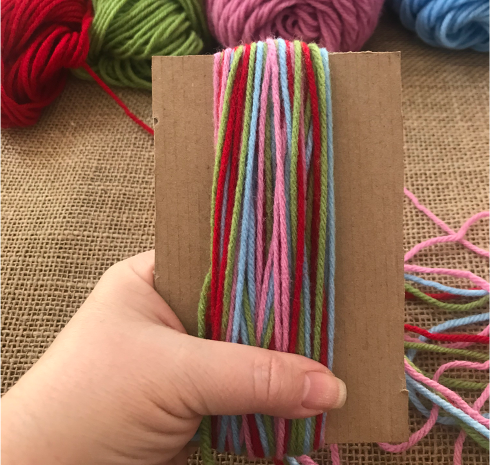
Begin winding both strands of yarn around and around the cardboard (middle photo).
Continue to wrap the strands about 35 times (right photo).
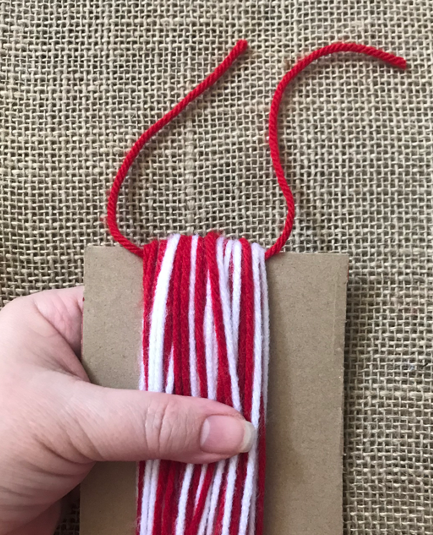
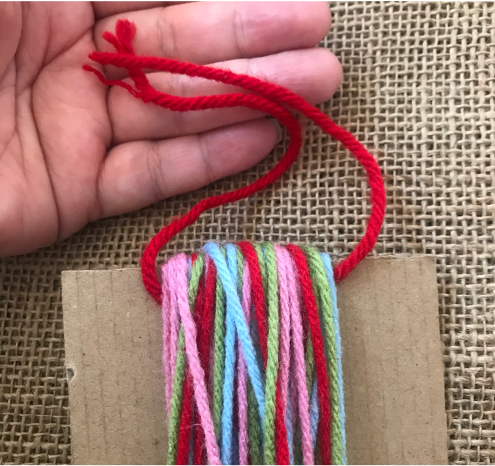
Cut a 12″ piece of yarn using the same color as the heart. Thread the piece of yarn between the cardboard and underneath side of the strands of wound yarn on the frontside of your cardboard (left photo).
Pulling tightly, tie and then knot the piece of yarn holding all the frontside strands securely together (right photo).
Wiggle the wound and tied strands of yarn off of the cardboard.
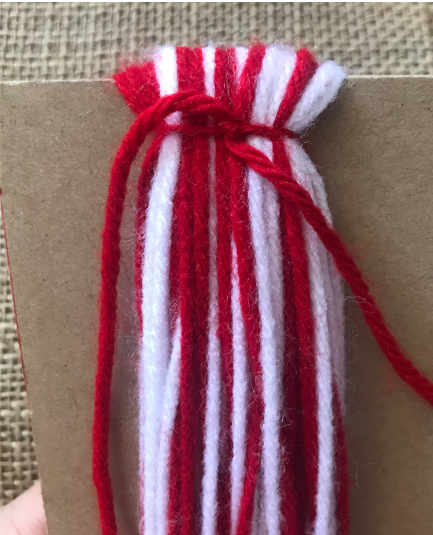
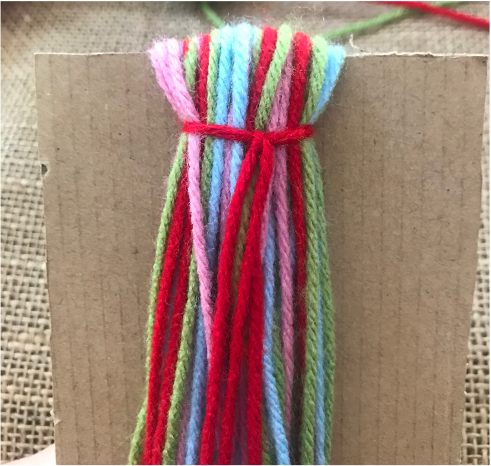
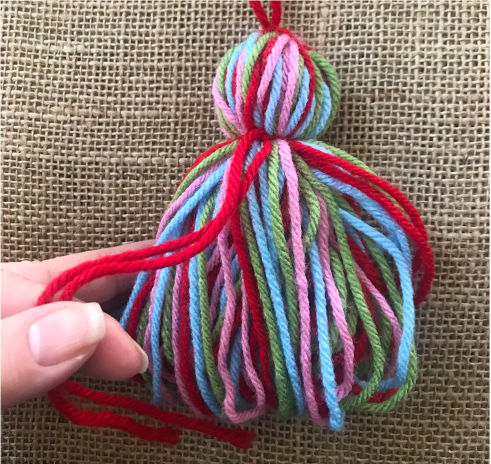
Cut a 16″ piece of yarn the same color as the heart.
Place the piece of yarn behind the tied strands of yarn keeping the previously tied section at the top.
Come down a bit from the top, then tie and knot the piece of yarn creating the top ball part of the tassel (left photo).
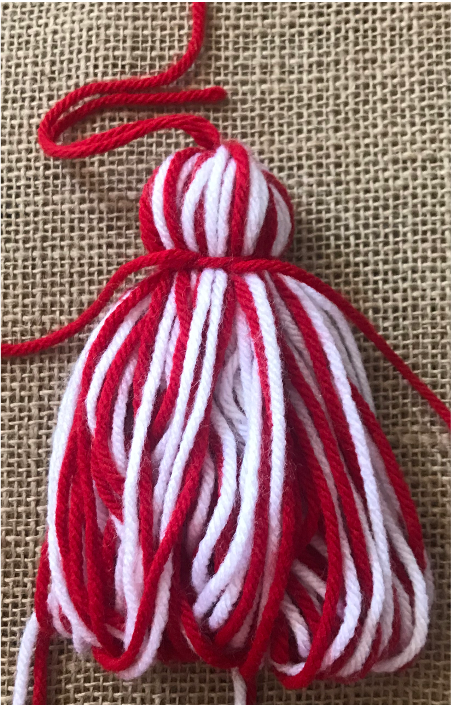
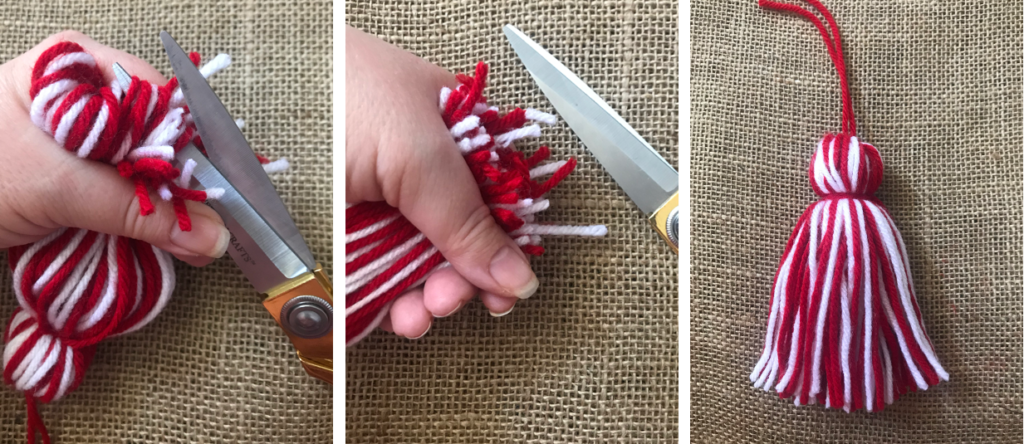
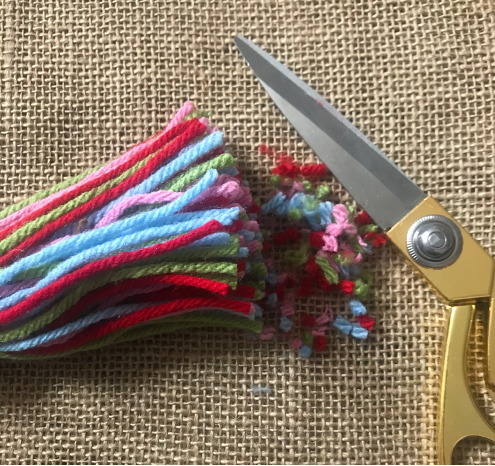
You will now want to cut the bottom loops of the tassel (left photo).
Then cut the ends so they are nice and even (middle photo).
The right photo shows a finished tassel.
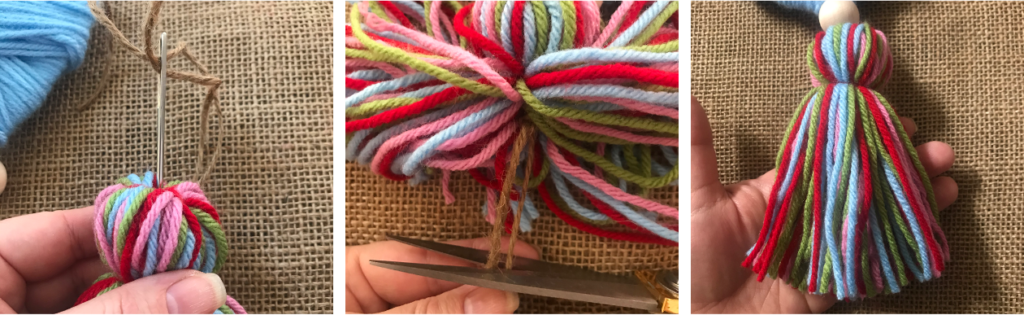
ATTACHING THE WOOD BEAD & TASSEL TO THE HEART
Thread your needle with both the strands of yarn that tied the top ball of the tassel.
Push your threaded needle up through the wood bead.
With the wood bead threaded, insert the needle up through the bottom point of the heart and bring it out just above the middle section of the yarn (left photo).
Tie and knot the tails of the yarn around a small portion of middle section yarn, then tuck and hide any remaining tails down into the middle section of yarn (left and middle photo).
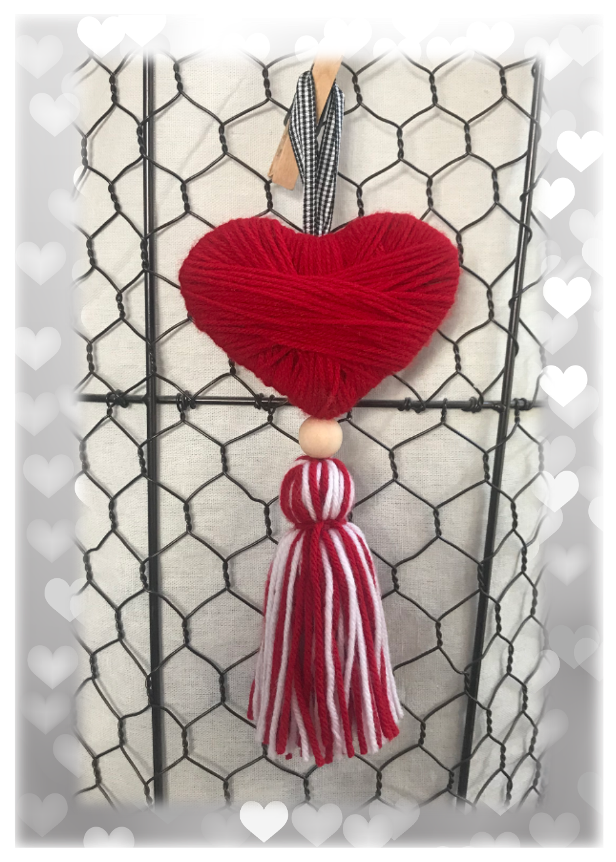
Right photo shows a finished single heart dangle.
DECORATIVE
FOUR
YARN HEARTS
DANGLE
Assembly
Supplies: 4 yarn hearts, twine, 4 wood beads, each skein of yarn used for the 4 hearts
ATTACHING YARN HEARTS & BEADS TO DANGLE TWINE
Cut a piece of jute twine about 80″L and then thread your needle with one end of the twine.
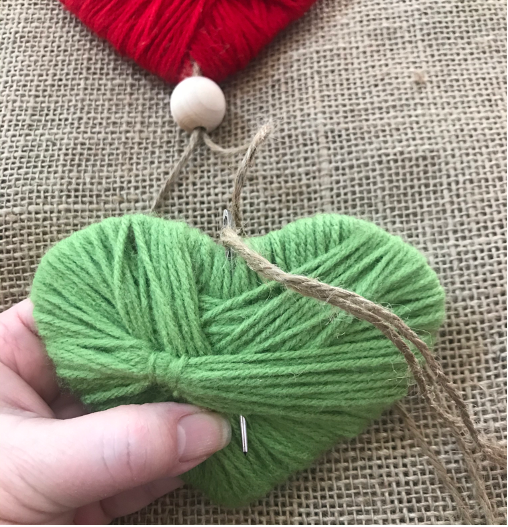
Take your first yarn heart and from the backside of the heart insert the threaded needle through the bottom point and up to about the middle of the heart (left photo).
Insert the needle one more time up through the top of the heart with the twine coming out of the top middle arched part of the heart (right photo).
NOTE: The jute twine has a bit of a rough texture so you will want to gently pull the twine through the yarn so that it doesn’t fray the yarn.
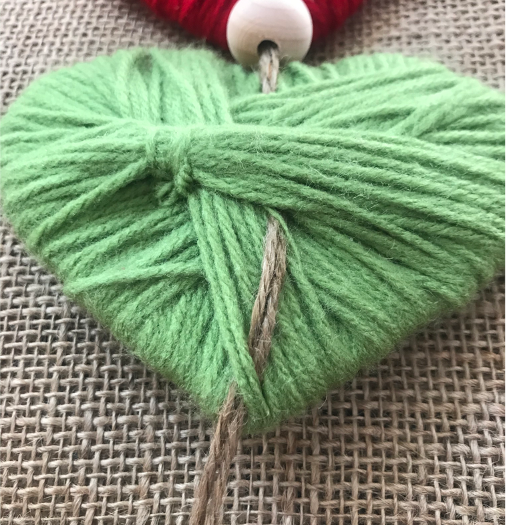
Insert the needle back down through the top arched middle of the heart (left photo) and push the needle down to about the middle of the heart, and then down through the point of the heart.
As you are pulling the yarn through the bottom point, leave enough of the twine at the top to make a loop for hanging (right photo).
Thread your needle with both ends of the twine, then insert the needle down through the first wood bead (left photo).
Continue to thread both ends of the twine down through the backside of the 2nd yarn heart with both ends of the twine coming out of the bottom point of the heart (right photo).
Repeat, threading the next bead, then the 3rd heart, the next bead and the 4th heart.
MAKING & ATTACHING THE TASSEL
Cut a scrap piece of corrugated cardboard about 3 1/2″ wide x 5 1/2″ tall.
Using the same colors of yarn as the hearts, layout all four skeins of yarn in front of you, then line up each end of yarn and drape all four strands over the top of the cardboard, holding the yarn in place with your thumb (left photo).
Wrap the 4 strands of yarn around and around the cardboard about 17 times (right photo).
Cut a 12″ piece of yarn using any of the 4 colors. Thread the piece of yarn between the cardboard and underneath side of the strands of wound yarn on the frontside of your cardboard (left photo).
Pulling tightly, tie and then knot the piece of yarn holding all the frontside strands securely together (right photo).
Wiggle the wound strands of yarn off of the cardboard.
The tied piece of yarn will now be the top of your tassel and the ends will blend in with the rest of the strands of yarn.
Cut a 16″ piece of yarn the same color as the 12″ piece.
Place the piece of yarn behind the tied strands of yarn keeping the previously tied section at the top (left photo).
Come down a bit from the top, then tie and knot the piece of yarn creating the top ball part of the tassel (right photo).
You will now want to cut the bottom loops of the tassel, then cut the ends so they are nice and even (left photo).
Thread your needle with both ends of the twine that is coming from the bottom point of the last strung heart, then add one last wood bead.
From the last bead, insert the threaded needle straight down through the middle of the top ball of the tassel (left photo).
Pull the twine gently down through the strands of yarn, pushing the tassel up to the last wood bead.
Separate the strands of yarn and cut the twine short enough that it doesn’t hang past the bottom of the tassel (middle photo).
Right photo shows the strung tassel at the bottom of the four heart dangle.
Ta da! I love this four heart dangle. The yarn color combinations are endless and I’m thinking I may make one to match my kitchen colors and leave it out all year long!!
Whether you make a single heart, several hearts, a garland or a dangle or two, here’s hoping these DIY Valentine Yarn Hearts bring a little extra love and happiness to your home. Happy Valentine’s Day everyone ❤️💕
Happy Creating!
Add Your Heading Text Here
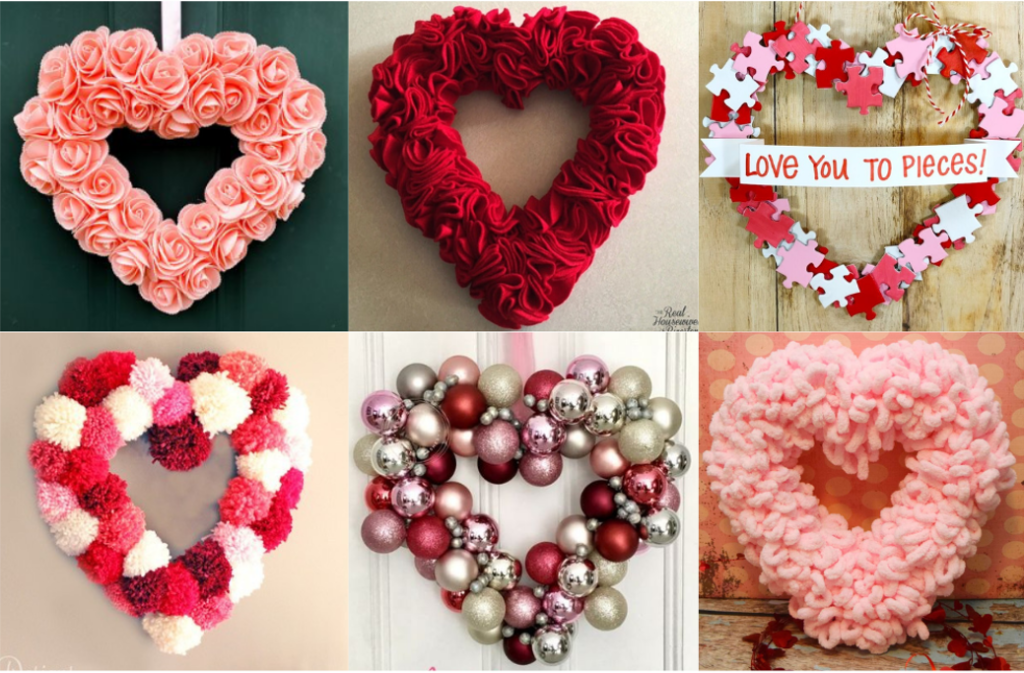
Check It Out!
These 6 DIY, no crochet skills required, Valentine wreaths, plus several more, are the perfect way to bring some love into your home! Find the post with several links here
Show a special someone just how much you love them this Valentine’s Day with these Best Ever French Toast Sticks. SO GOOD! Find the recipe here
kljkljlklklkj
Contact
I would love to hear from you! Feel free to leave me a comment below, use the ‘Contact Me’ section on the top menu bar and leave a comment there, or email me directly at mypassionatesoul123@gmail.com.
Subscribe
All subscribers welcome! If you would like to stay current and receive email updates with the latest My Passionate Soul news, alerts to new FREE patterns, exciting giveaway info and more, you can sign-up at the ‘Subscribe’ section of the sidebar menu. I promise you will never receive any spam, just yarn news and other crafty stuff!
***I put a lot of labor, love and time into the design of my patterns and create them for personal use only. Please do not sell my patterns and claim them as your own. Feel free to make and sell items you’ve made from my patterns, but if you do I ask that you link directly back to my post or blog and provide the link. You may also share my patterns on social media as long as you, again, link directly back to my post or blog and provide the link. Please do not copy and paste my patterns and claim them as your own. If selling items made from my patterns I ask that you use your own photos and do not re-publish any photos related to my patterns as your own. Thank you for your understanding.***
Love these hearts. Your instruction & pictures are helpful to quickly get them done. Mine are ready to hang on my fireplace where I have your adorable mugs hanging now. During December &January not very many people saw them but those that did spread the word how cute they looked. I received some requests about them & sent them to your site. Thank you for sharing
Thank you Debra for your kind words, and directing people to my sight! I’m so glad you liked the mugs and hearts. I’m excited about my upcoming patterns and growing my blog and your support is truly appreciated 😊


Debra
January 21, 2021 at 7:25 pmLove these hearts. Your instruction & pictures are helpful to quickly get them done. Mine are ready to hang on my fireplace where I have your adorable mugs hanging now. During December &January not very many people saw them but those that did spread the word how cute they looked. I received some requests about them & sent them to your site. Thank you for sharing
Lynnette
January 24, 2021 at 1:19 pmThank you Debra for your kind words, and directing people to my sight! I’m so glad you liked the mugs and hearts. I’m excited about my upcoming patterns and growing my blog and your support is truly appreciated 😊
Lynnette