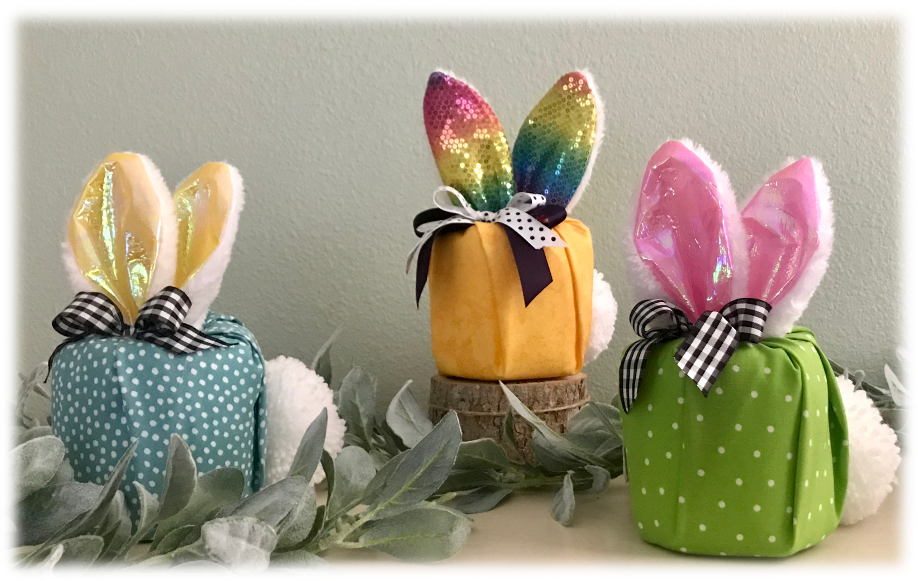
This Toilet Paper Bunny project is truly one of the quickest, easiest and inexpensive projects you will find. These bunnies are so adorable and add the perfect touch to your Easter and Spring decor. Find the free pattern below with lots of photos and easy-to-follow instructions.
INSPIRATION
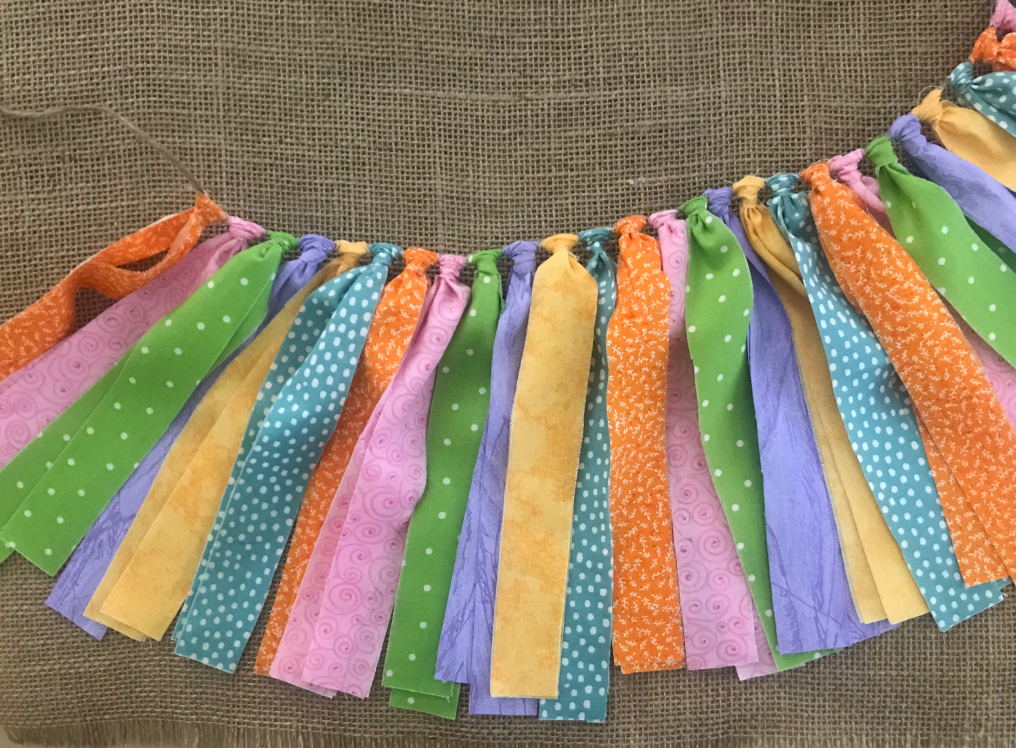
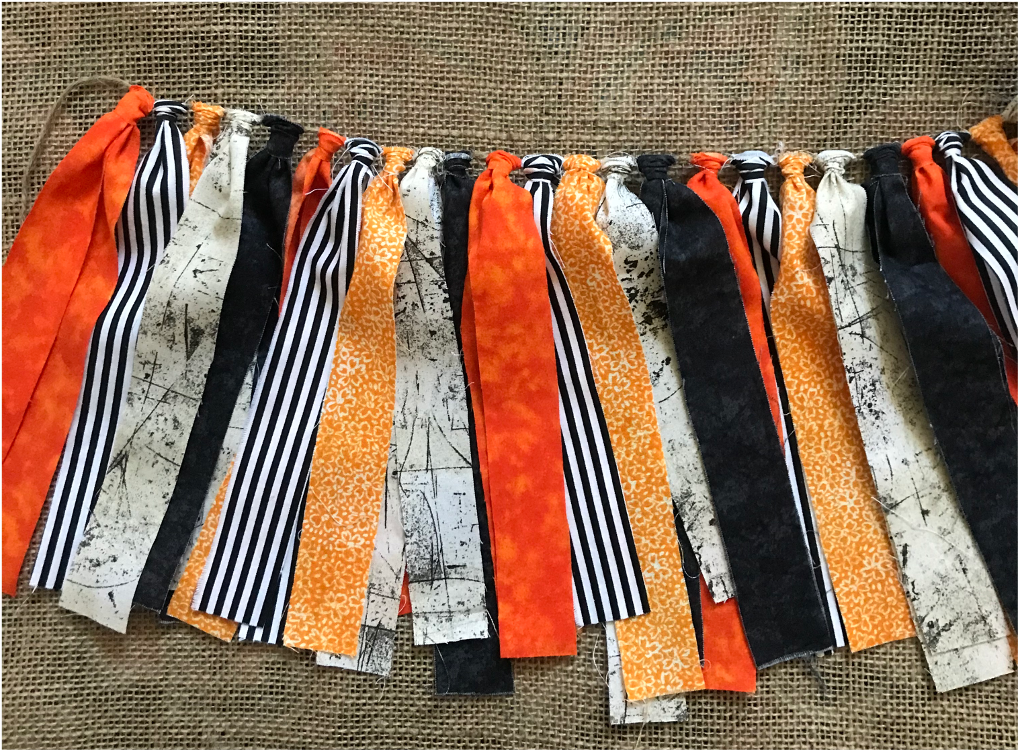
I made a fun Spring Fabric Rag Garland this month and had fabric leftover. Being one to not waste anything, I wondered what I could do with the extra fabric from the garland, since there was a considerable amount left from each fabric color. When I made my Vintage Halloween Fabric Rag Garland last fall, I made Toilet Paper Pumpkins with my leftover fabric. My mind went back to toilet paper rolls and I got the idea to do Toilet Paper Bunnies. I used up my leftover fabric, made another really cute project in under 30 minutes, and feel good about not wasting materials. I consider that a win!
Project From Previous Post
Find the instructions for the Spring Fabric Rag Garland here
SKILL LEVEL
EASY
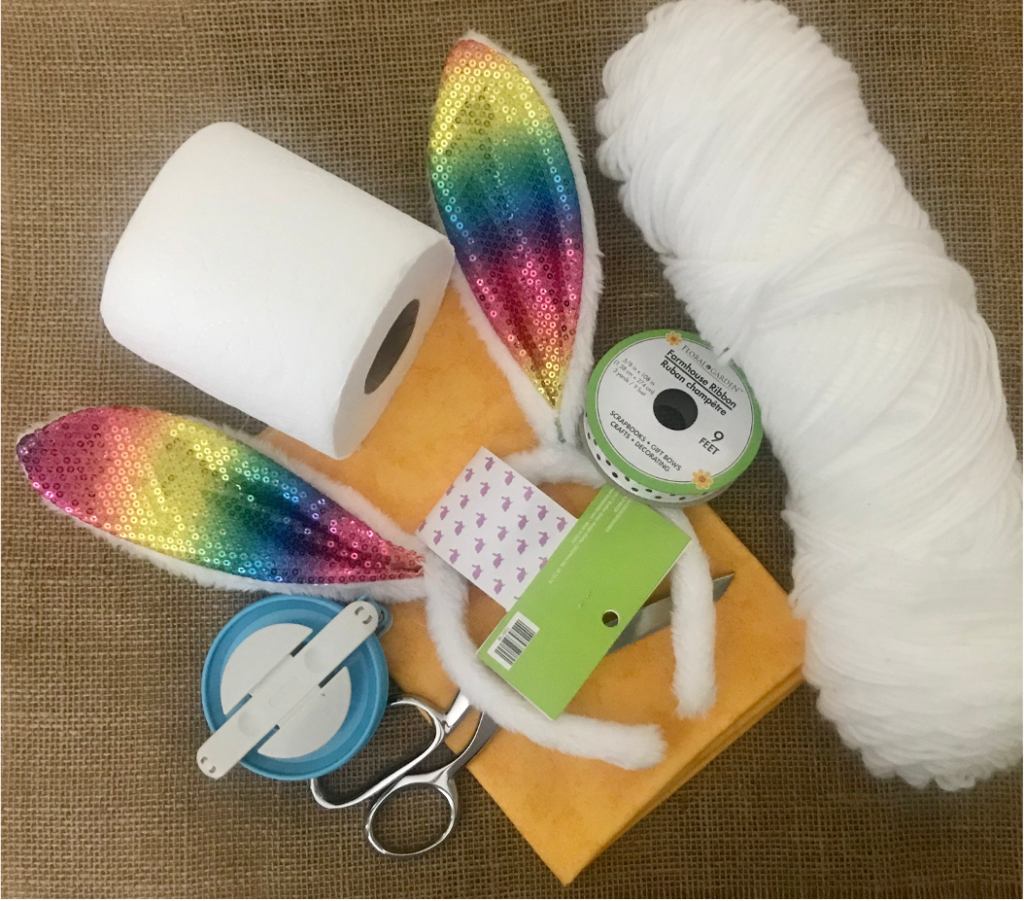
PROJECT MATERIALS
NOTE: I bought the toilet paper, bunny ear headband and ribbon at the Dollar Tree.
FABRIC
I used leftover fabric from a previous project.
Fabric should be at least 18″ x 18″. My leftover fabric was approximately 19 x 24.
ADDITIONAL MATERIALS
Bunny Ears Headband (Dollar Tree) Clover Pom Pom Maker Size 3 1/8″ (see below for another pom pom making option) Fabric Glue (I use Aleene’s Orignal Tacky Glue) Ribbon of your choice (Dollar Tree) Scissors Toilet Paper Roll(s) (Dollar Tree) WHITE medium 4 worsted weight yarn (for bunny tail)
Find Aleen’s Orignal Tacky Glue here – joann.com Find Clover Pom Pom Makers here – joann.com
PROJECT INSTRUCTIONS
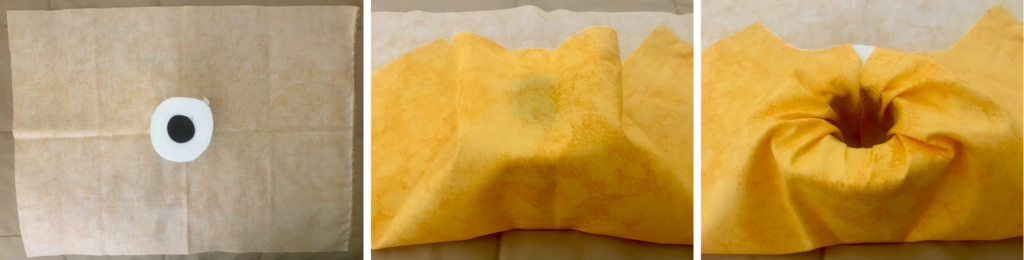
Place your fabric flat with wrong side up. Put your toilet paper roll in the center of the fabric (left photo).
Bring one side of the fabric up over the top of the toilet paper (middle photo).
Tuck the ends of the fabric down into the toilet paper tube (right photo).
Fold the next section of fabric slightly over the first section (left photo).
Bring the fabric up over the top of the toilet paper (middle photo).
Tuck the ends of the fabric down into the toilet paper tube (right photo).
Repeat all the way around until all of the fabric has been tucked down into the toilet paper tube.
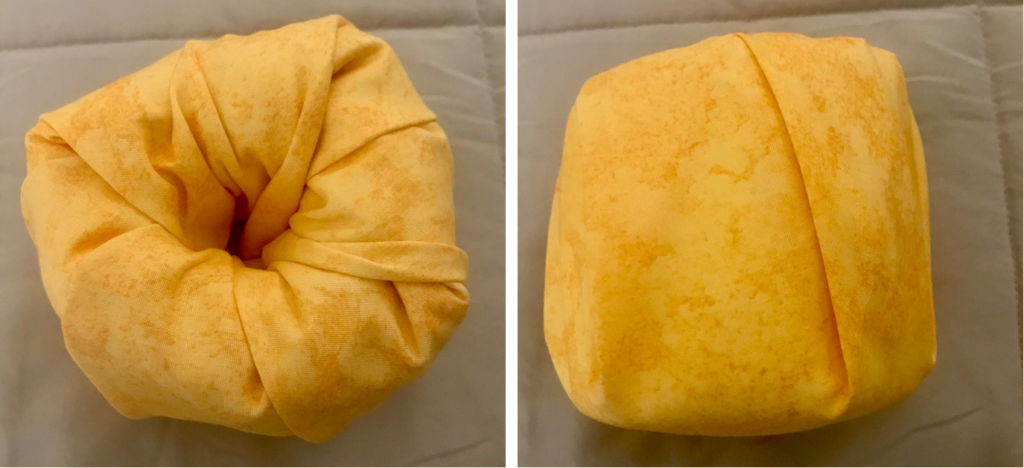
Photos below show the fabric tucked all the way around from the top view and front view.
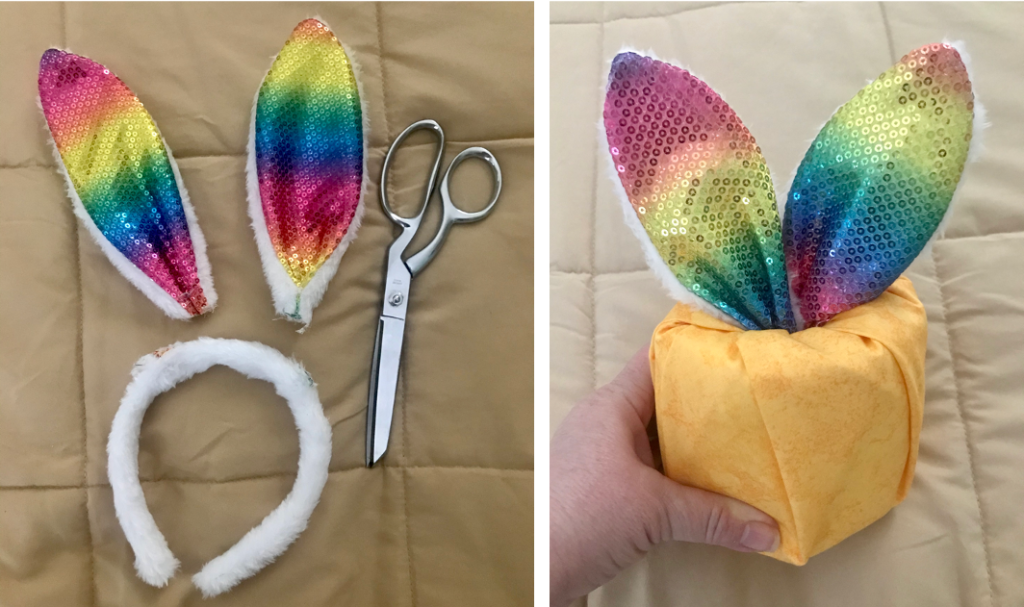
Cut each bunny ear from the headband (left photo).
Tuck the ears down into the fabric wrapped toilet paper tube (right photo).
MAKING A POM POM BUNNY TAIL
For the bunny tail you will want to use white yarn to make an approximately 3″ pom pom. I used the Clover Pom Pom Maker 3 1/8″ and it makes an almost perfect pom pom.
You can also make a pom pom by using just your hand. This blog post from 2beesinapod.com has directions for making a pom pom garland and within that post it gives instructions for making a hand pom pom.
The left photo shows a finished pom pom made with the Clover Pom Pom Maker.
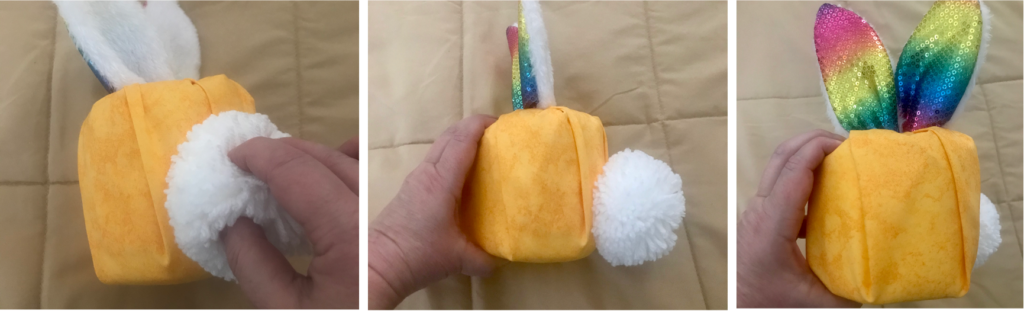
From the backside of your toilet paper bunny, take your fabric glue and, just off to the side, make a circle of glue big enough for a good portion of the pom pom to stick to (middle photo).
Flatten one side of the pom pom (right photo).
Stick the pom pom tail to the glue and hold it there for a minute or so to make sure it sticks (left photo). Re-fluff pom pom.
Middle photo show a side view of the bunny tail.
Right photo shows the front view of the toilet paper bunny with the pom pom tail peeking from the side.
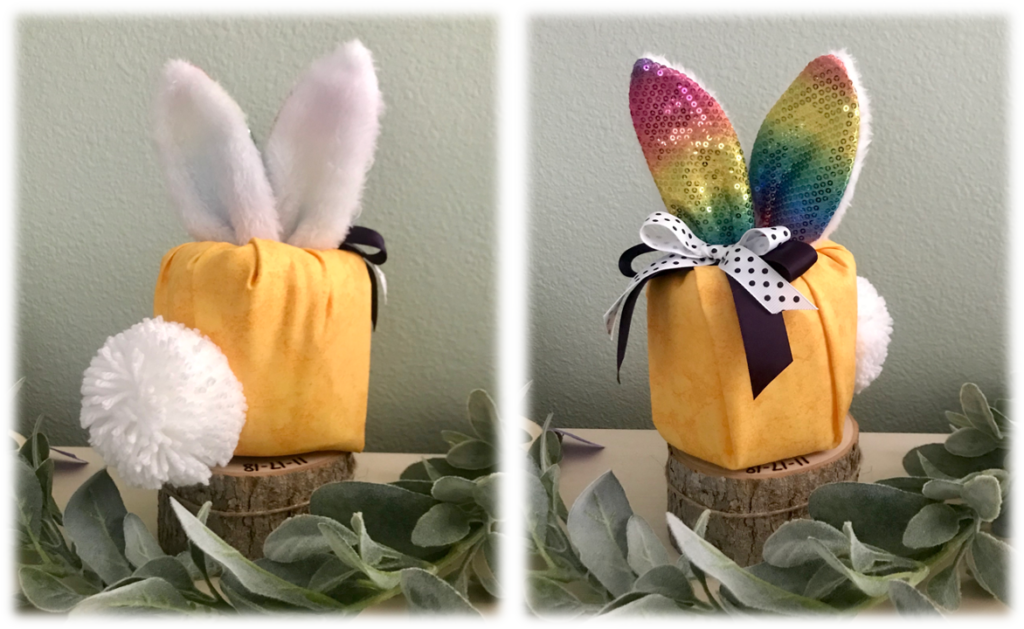
Back side view of the finished Toilet Paper Bunny.
Front side view of the finished Toilet Paper Bunny.
Past Post With Fabric Rag Garland & Toilet Paper Pumpkins
Find the Vintage Halloween Fabric Rag Garland How-To instructions here
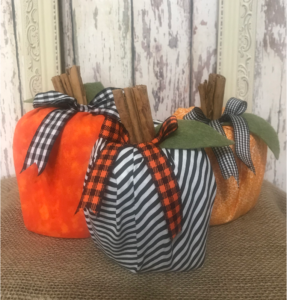
With my leftover Vintage Halloween Rag Garland fabric I made these adorable pumpkins. I used Dollar Tree toilet paper rolls, tucked the fabric down into the toilet paper tube, added 2 cinnamon sticks, a cut-out felt leaf and ribbon for each pumpkin.
Happy Creating!
Check It Out!
This Fabric Rag Garland screams Spring and makes the perfect companion with your Easter decor. Find the fee pattern here
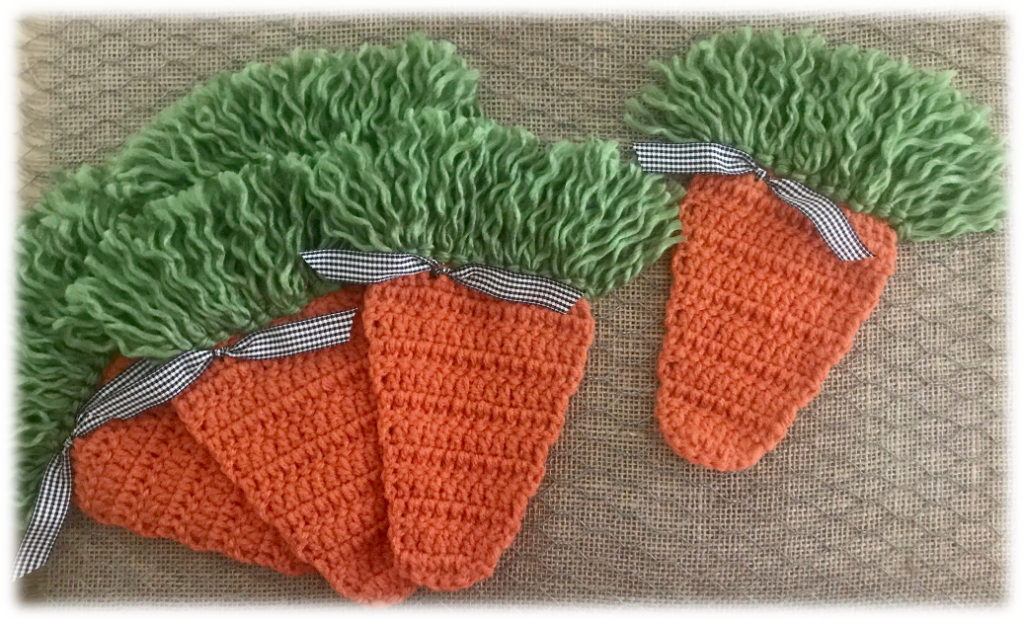
These Crochet Spring Carrot Coasters add the perfect touch to your Spring/Easter table! Find the free pattern here
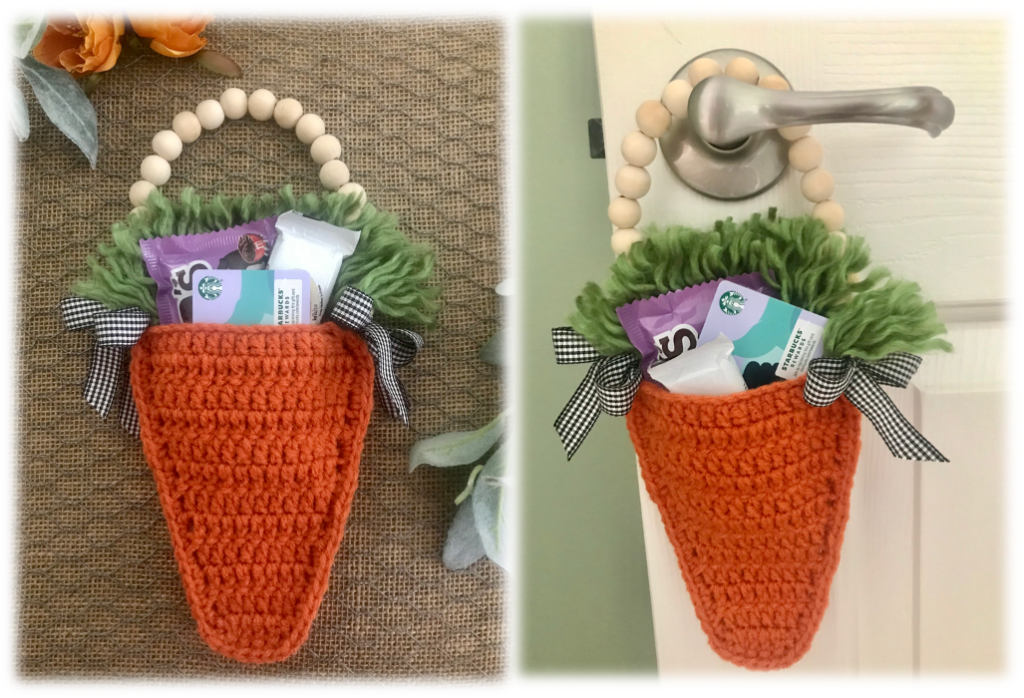
Hand out these adorable Crochet Spring Carrot Treat Pouches to your Easter guests, both young and old alike! Find the free pattern here
Contact
I would love to hear from you! Feel free to leave me a comment below, use the ‘Contact Me’ section on the top menu bar and leave a comment there, or email me directly at mypassionatesoul123@gmail.com.
Subscribe
All subscribers welcome! If you would like to stay current and receive email updates with the latest My Passionate Soul news, alerts to new FREE patterns, exciting giveaway info and more, you can sign-up at the ‘Subscribe’ section of the sidebar menu. I promise you will never receive any spam, just yarn news and other crafty stuff!
***I put a lot of labor, love and time into the design of my patterns and create them for personal use only. Please do not sell my patterns and claim them as your own. Feel free to make and sell items you’ve made from my patterns, but if you do I ask that you link directly back to my post or blog and provide the link. You may also share my patterns on social media as long as you, again, link directly back to my post or blog and provide the link. Please do not copy and paste my patterns and claim them as your own. If selling items made from my patterns I ask that you use your own photos and do not re-publish any photos related to my patterns as your own. Thank you for your understanding.***


Leave a Reply