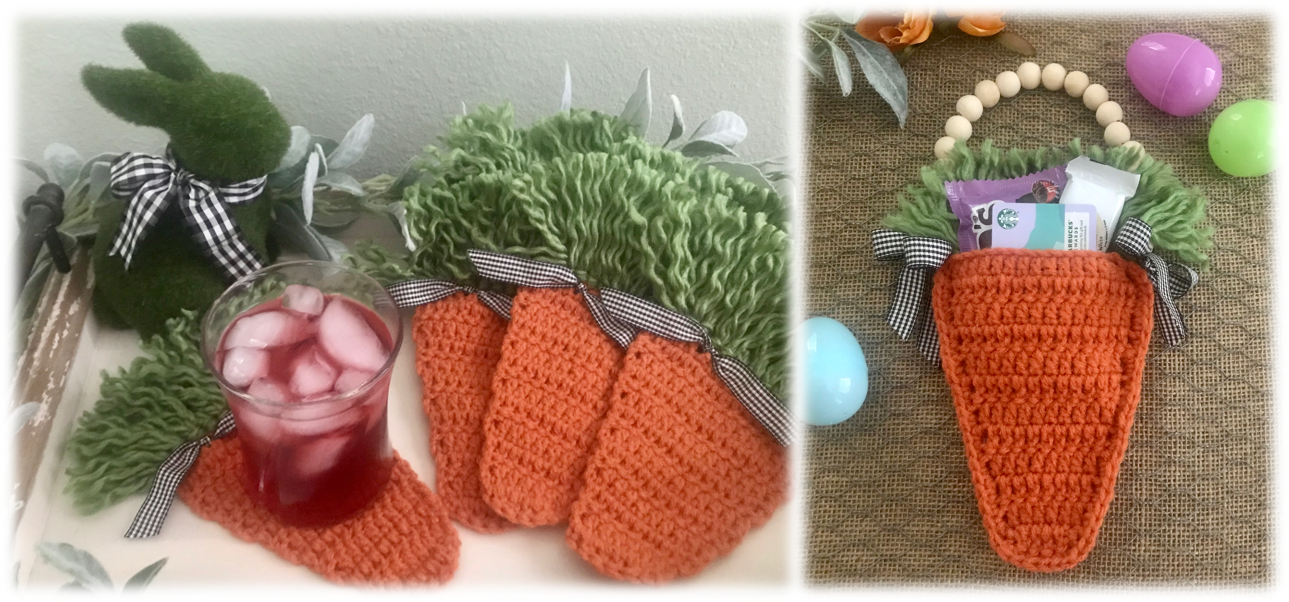
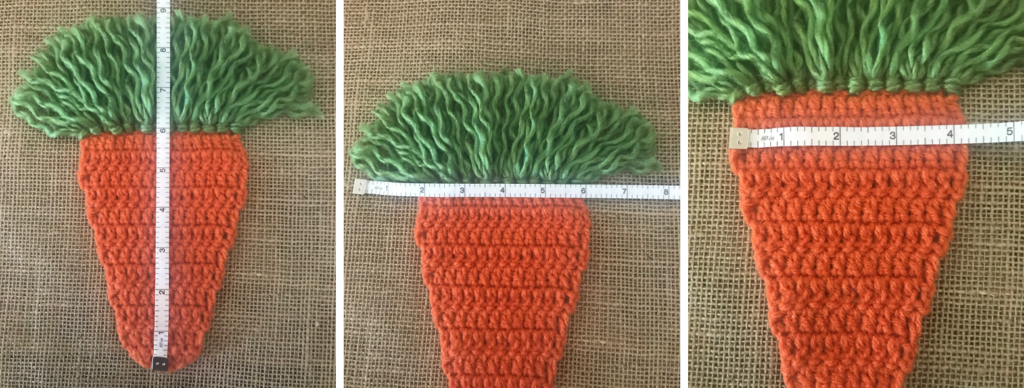
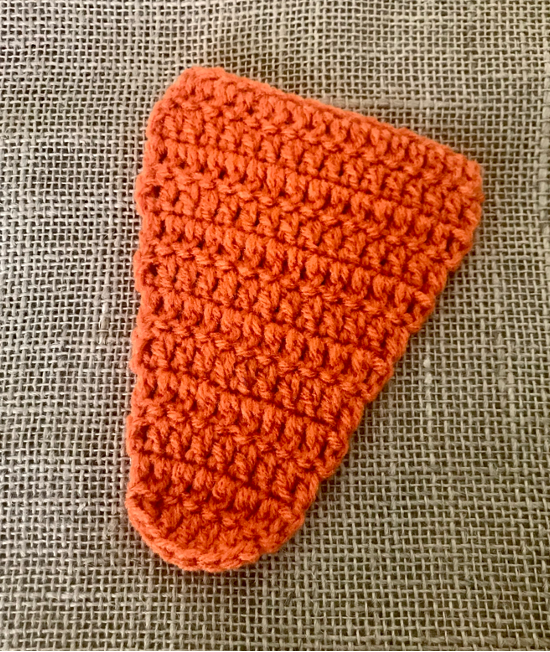
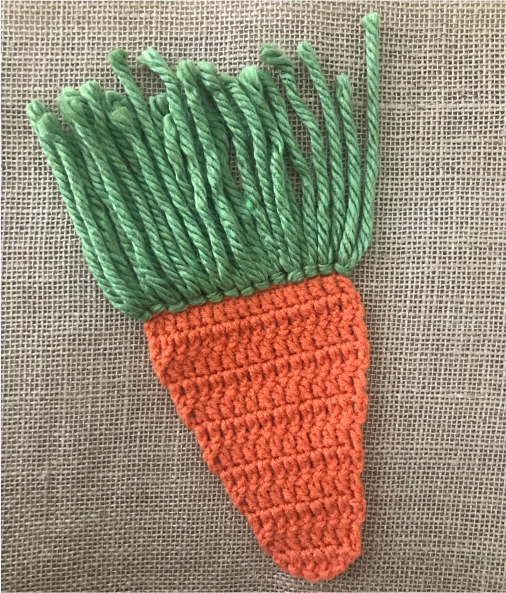
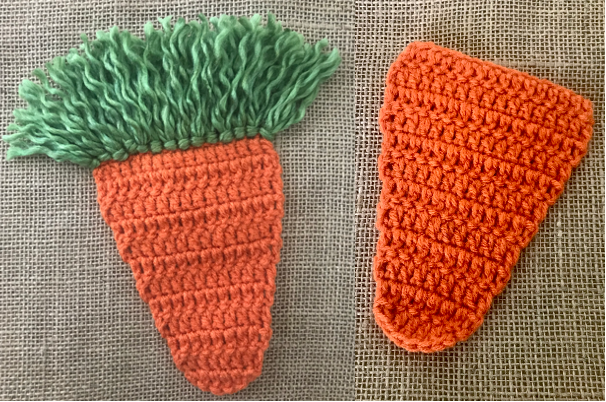
Crochet Spring Carrot Coasters / Treat Pouch


This Crochet Spring Carrot offers 2 designs with 1 pattern!  Easy and simple instructions are provided with the FREE pattern below.  Make a set of coasters to liven up your Easter table decor, make treat pouches for all your guests (both kiddos and adults alike), or do both!   

INSPIRATION

Yes, fall is my absolute favorite season, but spring is a very close second.  I love all the springs brings… beautiful flowers, birds chirping, cool breezes, lush green yards, and of course, Easter!  When I think about the decor that represents Easter, like bunnies, bright colored eggs, baskets and chocolate candies, I also think of carrots.  One of the very first projects I did when I first learned to crochet was a set of 12 crochet carrot coasters.  I was so proud of them and loved how they looked on our Easter table.  I’ve revised the pattern since then and came up with a second alternative with this carrot pattern – the Crochet Spring Carrot Treat Pouch.  The coasters and pouch are both so cute and perfect for this spring holiday!!

CROCHET SKILL LEVEL

EASY

The pattern for this crochet spring carrot is an easy level pattern that uses basic repetitive double crochet stitches with simple finishing.  

Easy instructions for both designs.

PROJECT MATERIALS

YARN - for these crochet spring carrot projects I used:

Red Heart Super Saver Yarn in CARROT
Medium 4 / 100% Acrylic/ 364 yrds
Partial Skein

Lion Brand Hometown USA Yarn in OKLAHOMA CITY GREEN
Super Bulky 6 / 100% Acrylic / 81 yrds
Partial Skein

Find Red Heart Super Saver Yarn here – joann.com

Find Lion Brand Hometown USA Yarn here – joann.com

CROCHET HOOK(S)

H/8-5.00MM

ADDITIONAL NOTIONS

Measuring Tape
Scissors
Yarn/Tapestry Needle(s)

NOTE:  I always have 2 sizes of yarn needles on hand when working on my crochet projects.

Needle Size 16 – I use for Med 4 or smaller yarn. I especially like using this size needle when I’m weaving in my tails because it is a thinner gauge needle and doesn’t stretch my stitches as I’m weaving (which the larger needle can sometimes do).

Needle Size 13 – This needle is great when using Bulky yarns because the eye of the needle accommodates the thicker yarn better than the size 16 needle.

Find Size 16 Yarn Needles here –    joann.com

Find Size 13 Yarn Needles here –    joann.com

FOR COASTERS
Ribbon – your choice (I used 5/8″W ribbon in a tiny black and white check)

FOR TREAT POUCH
Floral Wire – 22 gauge
Ribbon – your choice (I used 5/8″W ribbon in a tiny black and white check)
Wood Beads – .47″ (12mm/1.2cm) – QTY 20

Find Floral Wire here – joann.com
Find Ribbon here – joann.com
Find .47″ Wood Beads here – joann.com

PROJECT MEASUREMENTS

Crochet Spring Carrot measures approximately 9″ tall from bottom of carrot to the top of the carrot greens (left photo).

Crochet Spring Carrot measures approximately 8″ across the carrot greens (middle photo).

Crochet Spring Carrot measures approximately 4 1/4″ across the widest part of the carrot (right photo).

CROCHET ABBREVIATIONS (US terms)

ch – chain
dc – double crochet
sc – single crochet
st/sts – stitch/stitches

Pattern - CROCHET SPRING CARROT

CARROT (I used yarn color CARROT)

NOTE:  

For Coasters – make 6 or more carrots

For Treat Pouch – make 2 carrots

Ch 16

Row 1 – ch an additional 2, dc 1 in the 3rd chain from the hook, dc 1 in each st across, ch 2, turn (16)

Row 2 – dc 1 in the first st and in each st across, ch 2, turn (16)

Row 3 – skip the first st, dc 1 in the 2nd st and in every st across, ch 2, turn (15)

Row 4 – skip the first st, dc 1 in the 2nd st and in every st across, ch 2, turn (14)

Row 5 – skip the first st, dc 1 in the 2nd st and in every st across, ch 2, turn (13)

Row 6 – skip the first st, dc 1 in the 2nd st and in every st across, ch 2, turn (12)

Row 7 – skip the first st, dc 1 in the 2nd st and in every st across, ch 2, turn (11)

Row 8 – skip the first st, dc 1 in the 2nd st and in every st across, ch 2, turn (10)

Row 9 – skip the first st, dc 1 in the 2nd st and in every st across, ch 2, turn (9)

Row 10 – skip the first st, dc 1 in the 2nd st and in every st across, ch 2, turn (8)

Row 11 – skip the first st, dc 1 in the 2nd st and in every st across, NO ch 2, turn (7)

Row 12 – sc 1 in the 2nd st, dc 1 in the next 4 sts, sc 1 in the last st (6)

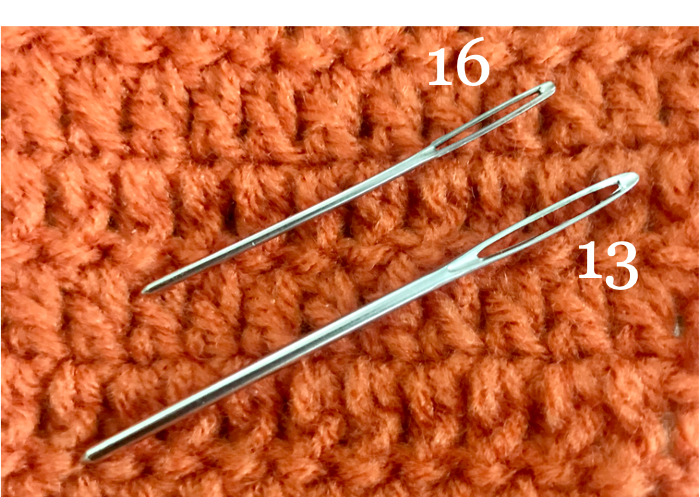
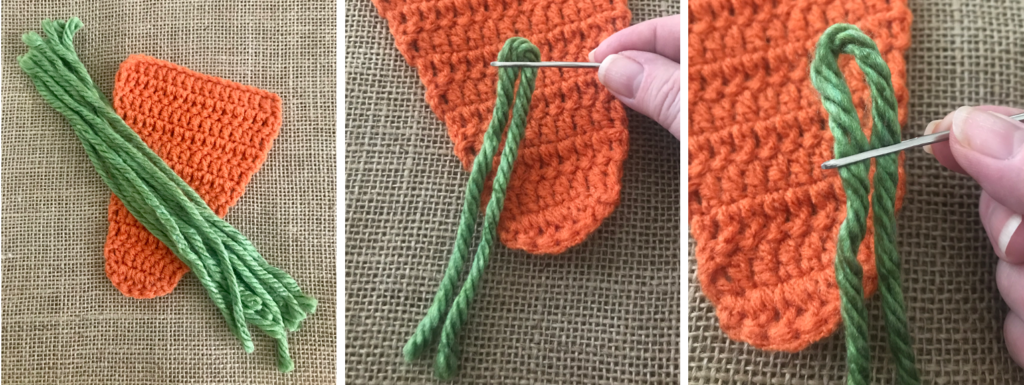
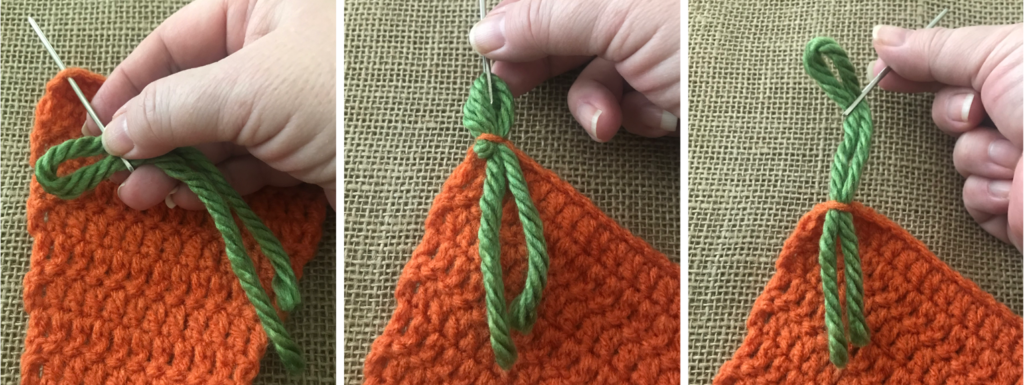
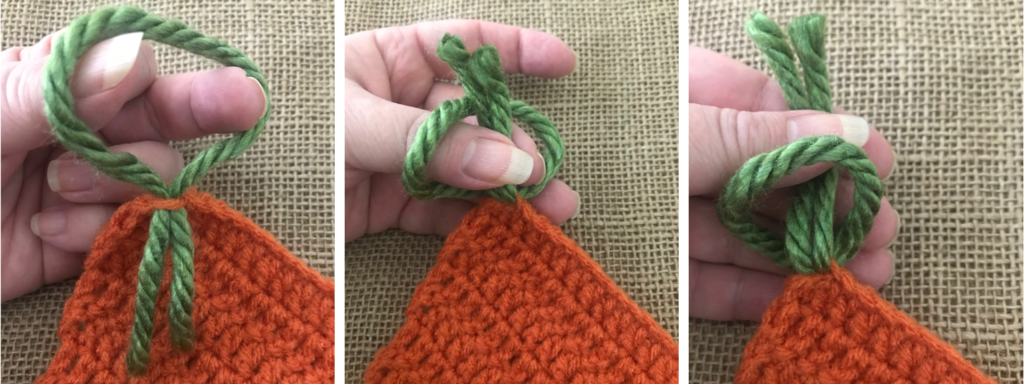
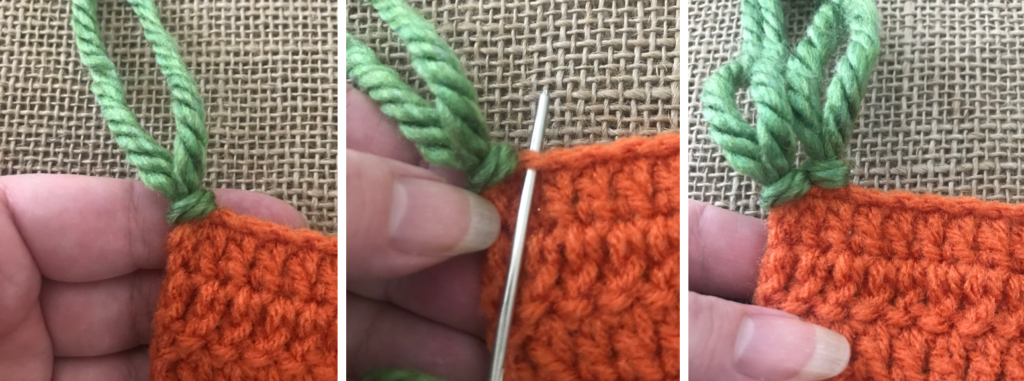
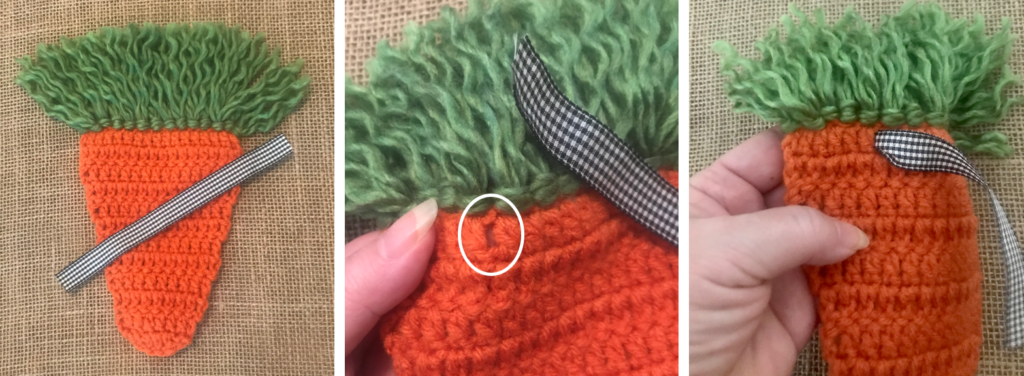
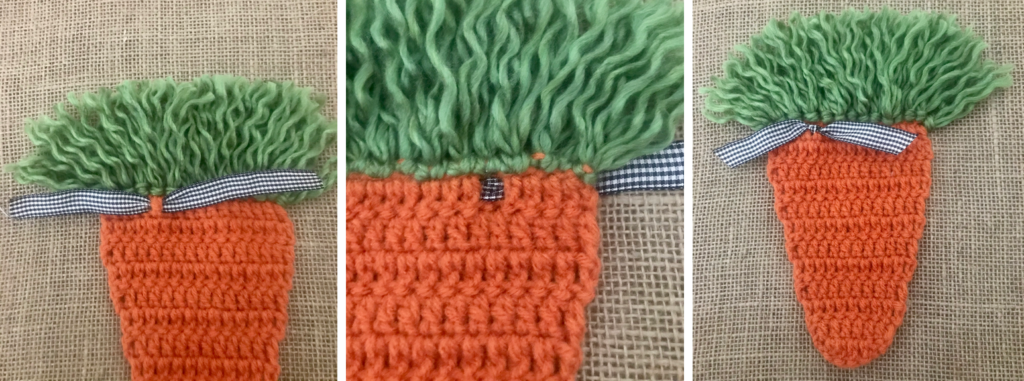
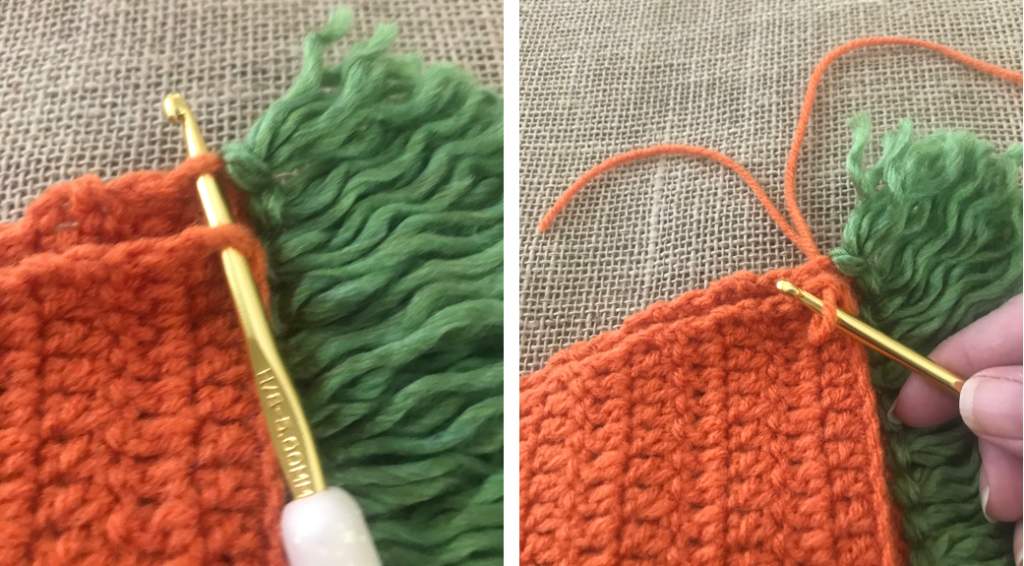
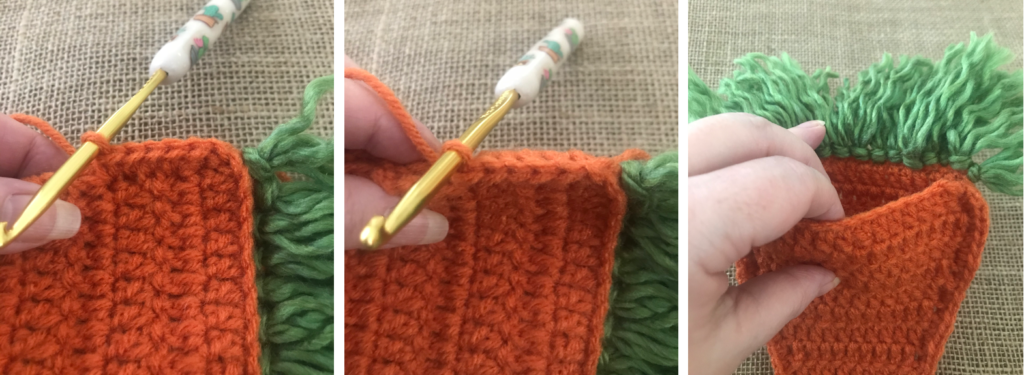
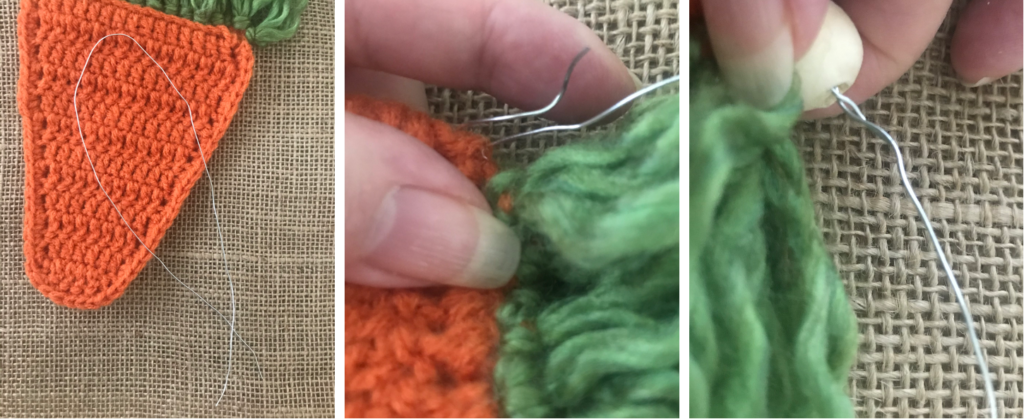
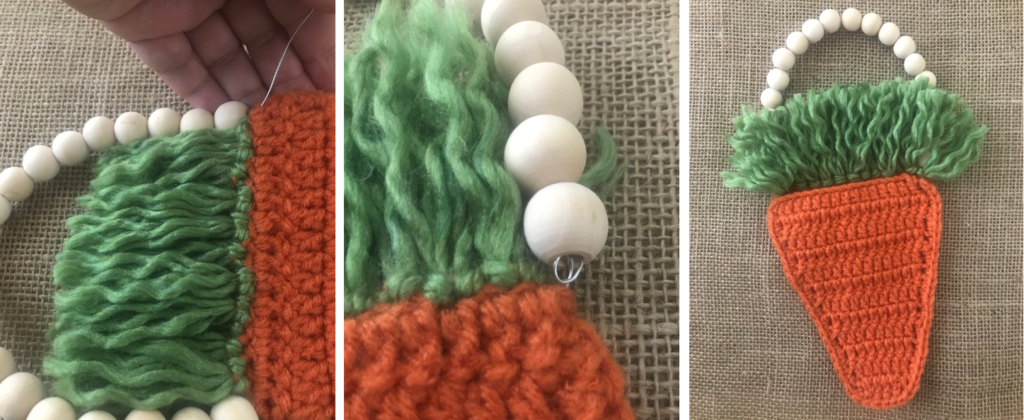
Tie off and weave in tails

CARROT TOP GREENS (I used yarn color OKLAHOMA CITY GREEN - bulky yarn)

NOTE:  If you are making the Crochet Spring Carrot Treat Pouch, you will make one carrot without the top greens and one with the greens.  The carrot coasters will all have the top greens.

Cut 14 – 8″ pieces of yarn per carrot (left photo).

With the first piece of yarn, fold it in half and thread the folded end through your yarn needle (I used a size 13 needle) – (middle photo).

Pull the folded end of the yarn up part way to form a loop (right photo).

Working from the front side of the carrot, insert your threaded needle in the top left corner of the carrot (left photo).

Pull the yarn through about half way (middle and right photos).

Using your thumb and index finger, open up the loop (left photo).

With those same fingers in the loop, grab the ends of the piece of yarn (middle photo).

Pull the ends through the loop (right photo).

Tighten up the loop snug to the carrot (left photo).

Thread another piece of yarn and insert your needle in the very next stitch from the first attached yarn piece (middle photo).

Snug that piece up to the carrot (right photo).

Repeat across the top of the carrot until all 14 pieces of yarn have been attached.

To fray the yarn pieces use your nail or end of your needle to separate the piece into two separate sections (left and middle photo).

Now separate each of the two sections and you will have four individual strands per yarn piece (right photo).

Repeat with each yarn piece across until all pieces have been frayed.

With your measuring tape measure from the point where the carrot and the greens are attached and measure up 3″ (left photo).  

Cut all the frayed strands straight across at the 3″ mark.

Round out both the right and left sides of the greens (middle photo).

Right photo shows a finished carrot.

ASSEMBLING THE CROCHET CARROT COASTERS

Cut a 7″L piece of ribbon for each coaster (left photo).

Starting from the front side, top lefthand corner of the carrot count in 5 dc sts.

In the space between the 5th & 6th dc sts (middle photo), push one end of the ribbon through to the backside of the carrot (right photo).

Pull the ribbon behind the 5th dc st and up through the front side between the 4th & 5th dc sts (left photo).

The middle photo shows the backside of the carrot with the ribbon threaded through.

Tie the ribbon in a knot around that 5th dc st, then trim each end.  The right photo shows a finished coaster.

ASSEMBLING THE CROCHET CARROT TREAT POUCH

Use one crochet carrot with top greens and one without the greens

Place the carrot without the greens on top of the carrot with.  Turn the two carrot pieces sideways and insert your crochet hook through the top left corner of both pieces (left photo).

Pull through the CARROT colored yarn you used to make the crochet carrots (right photo).

Going through both the front carrot and back carrot, sc 1 in each set of sts around (left photo).  NOTE:  Do not sc 1 across the top of the carrot

The middle photo shows the sc sts through both the front and back carrot pieces, making a closed seam.

Once you have finished the sc sts and made a closed seam around the carrot, tie off and weave in tails.

The right photo shows the opening of the pouch you have just created.

Cut a 16″L piece of floral wire (left photo).

Working from the backside of the carrot pouch, insert the wire through the top, left hand side of the back carrot only. Do not push the wire through the front carrot.  Bend the end of the wire up toward the backside carrot greens (middle photo).

Twist the wire together, then thread your first bead down over the twisted wire (right photo).

Continue threading beads until all 20 beads are on the wire.

Once all the beads have been threaded across the wire, insert the remaining end of the wire through the top, left hand side of the back carrot only. Do not push the wire through the front carrot (left photo).

Bend the end of the wire up toward the backside carrot greens, give the wire a twist and then thread whatever is left of the wire up through the beads (middle photo).

The right photo shows a Crochet Spring Carrot Treat Pouch with the wood bead handle attached.

Cut 2 – 16″ pieces of ribbon.

Tie the first ribbon around the visible bit of wire showing just below the first strung bead.  Make a bow and trim the ends.

Repeat on the other side.

Wishing you all a Wonderful Spring Season and a Very Happy Easter however you choose to celebrate! 


Happy Creating! 

Blog author's signature added to the end of each crochet post.
Add Your Heading Text Here

Check It Out!

A DIY Tassel & Pom Pom Wood Bead Garland with color changes to match your scheme makes the perfect companion to any home decor!  Find the free pattern here

These Crochet Double Layered Bowl Cozies provide the perfect protection from extremely hot or really cold bowls.  Find the free pattern here

BONUS soup recipe included with pattern

Dress up your 3-wick candles with a comfy cozy sweater-like Crochet Sweater Candle Cozy! Find the free pattern here

kljkljlklklkj

Contact

I would love to hear from you!  Feel free to leave me a comment below, use the ‘Contact Me’ section on the top menu bar and leave a comment there, or email me directly at mypassionatesoul123@gmail.com. 

Subscribe

All subscribers welcome!  If you would like to stay current and receive email updates with the latest My Passionate Soul news, alerts to new FREE patterns, exciting giveaway info and more, you can sign-up at the ‘Subscribe’ section of the sidebar menu.  I promise you will never receive any spam, just yarn news and other crafty stuff!

***I put a lot of labor, love and time into the design of my patterns and create them for personal use only. Please do not sell my patterns and claim them as your own. Feel free to make and sell items you’ve made from my patterns, but if you do I ask that you link directly back to my post or blog and provide the link. You may also share my patterns on social media as long as you, again, link directly back to my post or blog and provide the link. Please do not copy and paste my patterns and claim them as your own. If selling items made from my patterns I ask that you use your own photos and do not re-publish any photos related to my patterns as your own.  Thank you for your understanding.***


Leave a Reply