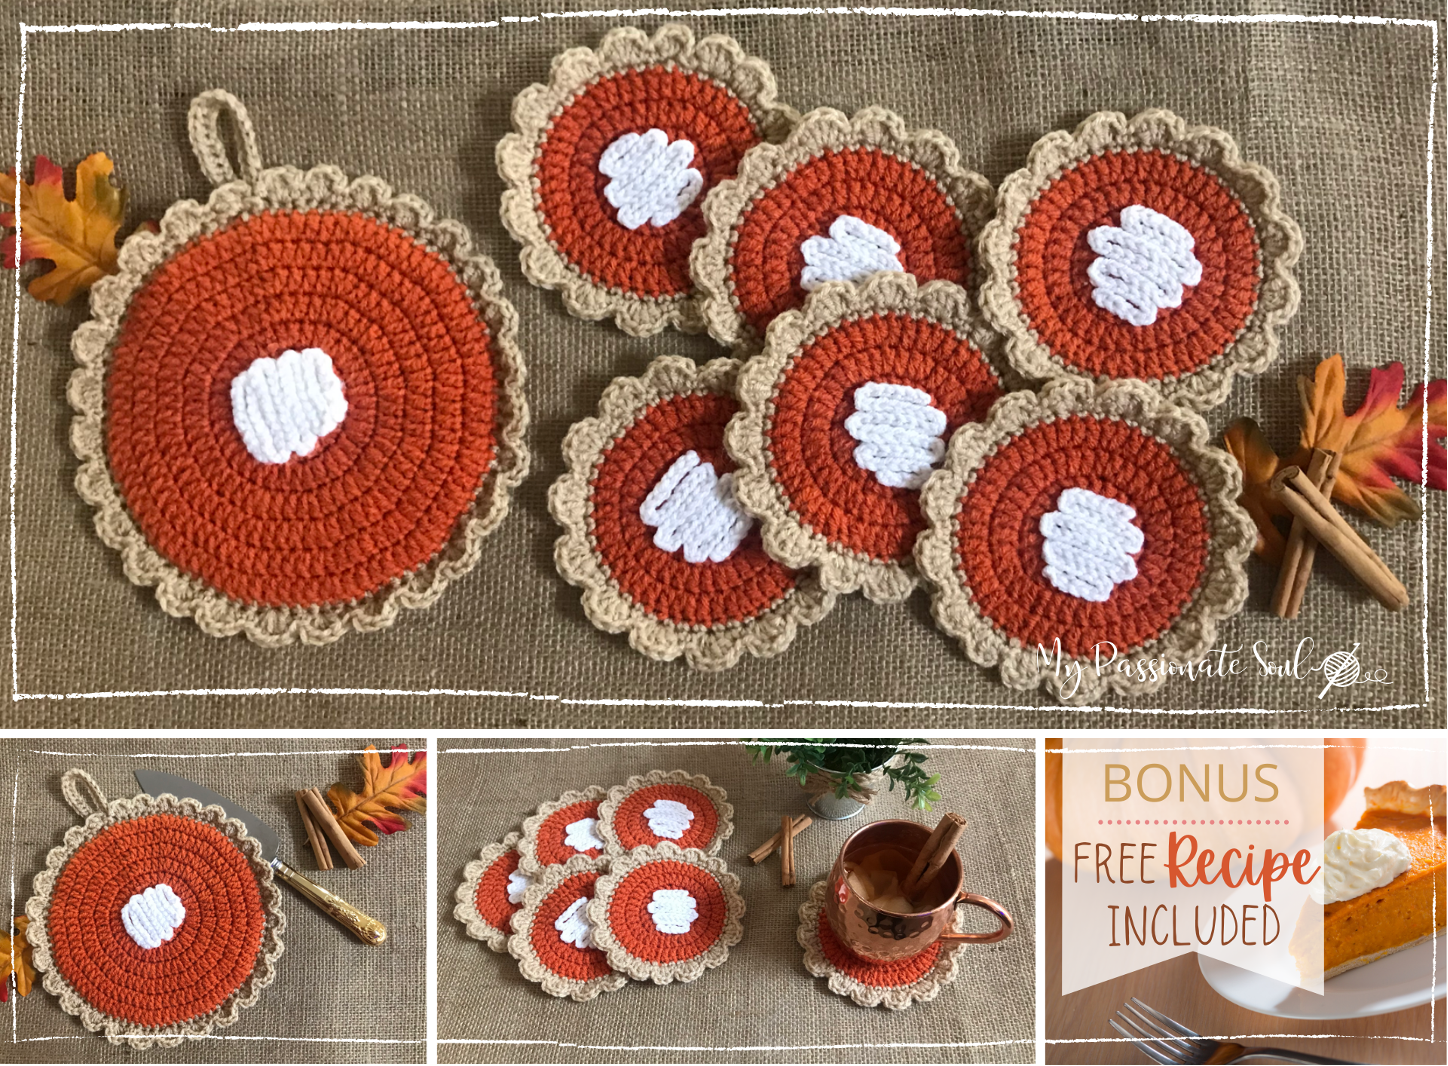
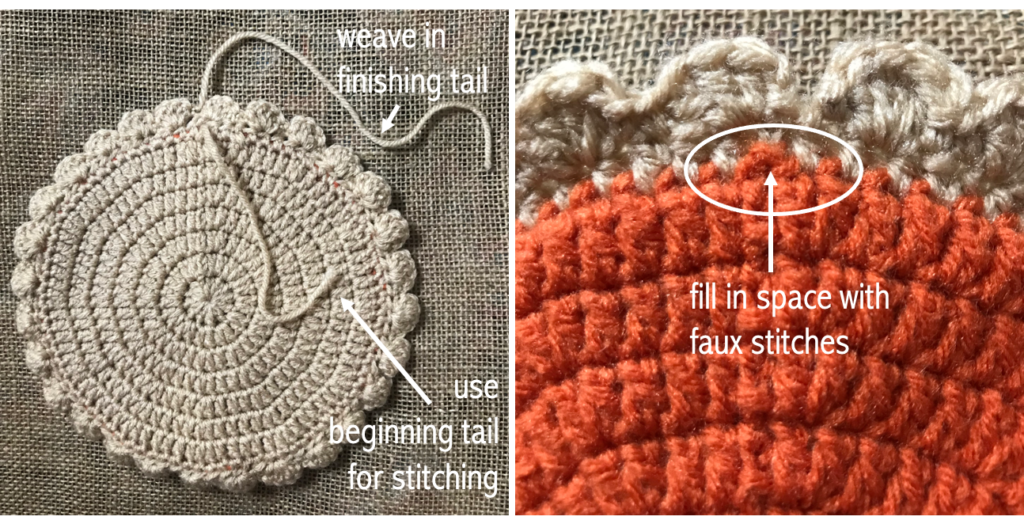
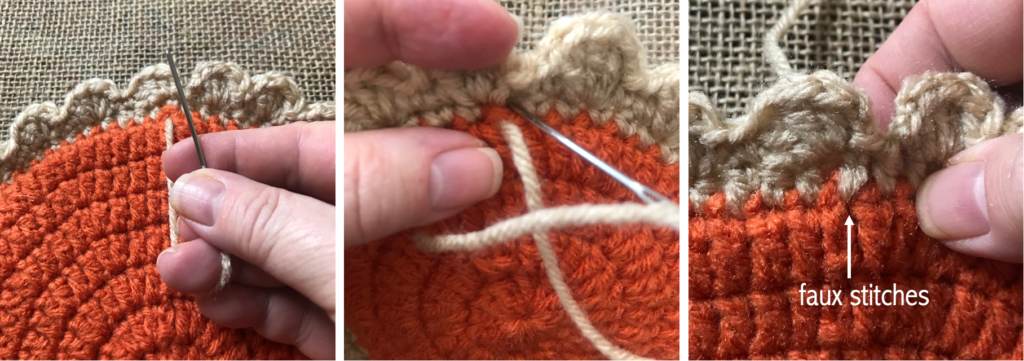
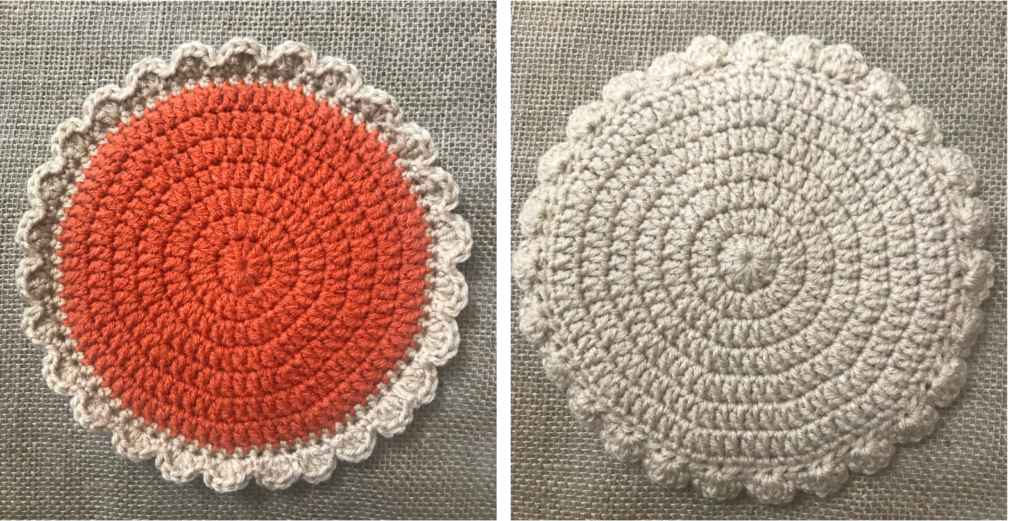
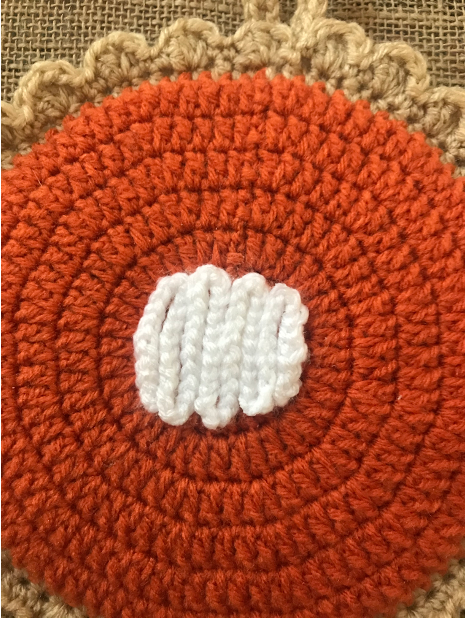
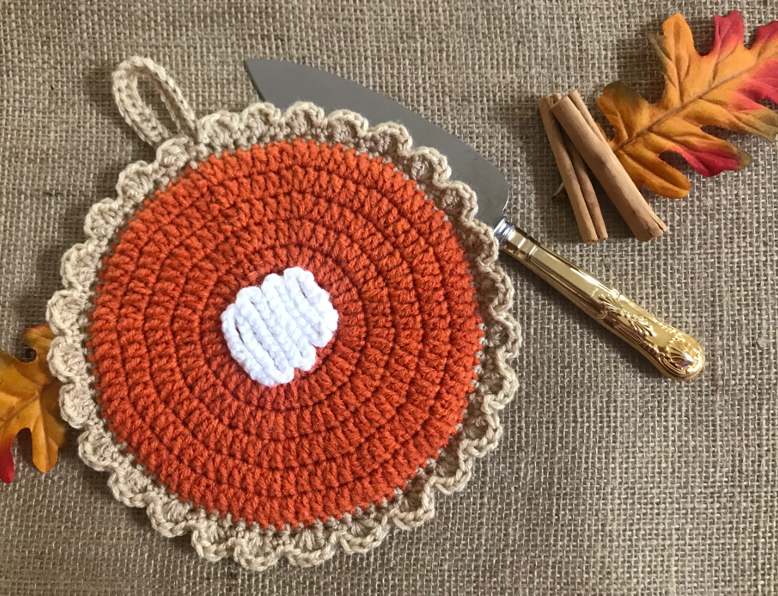
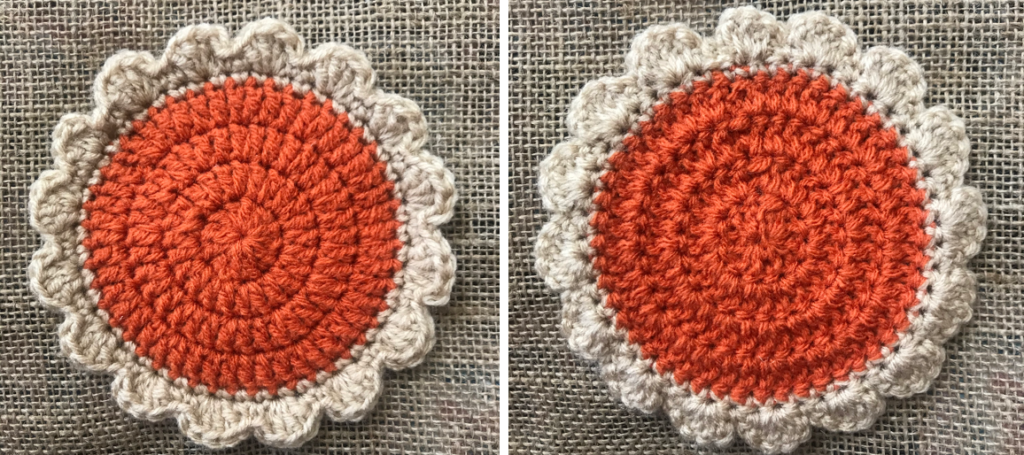
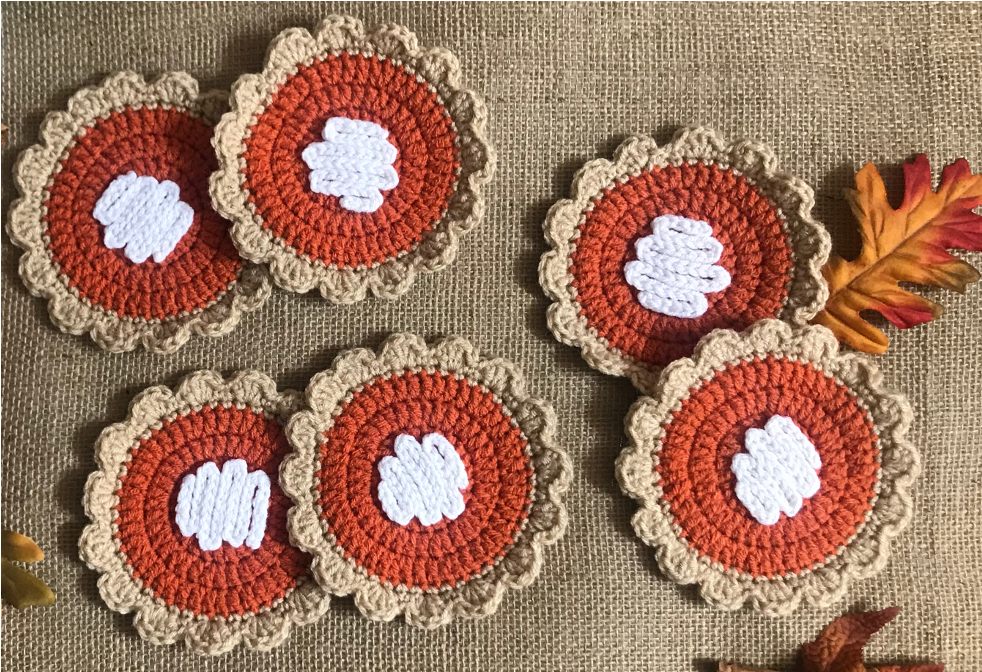
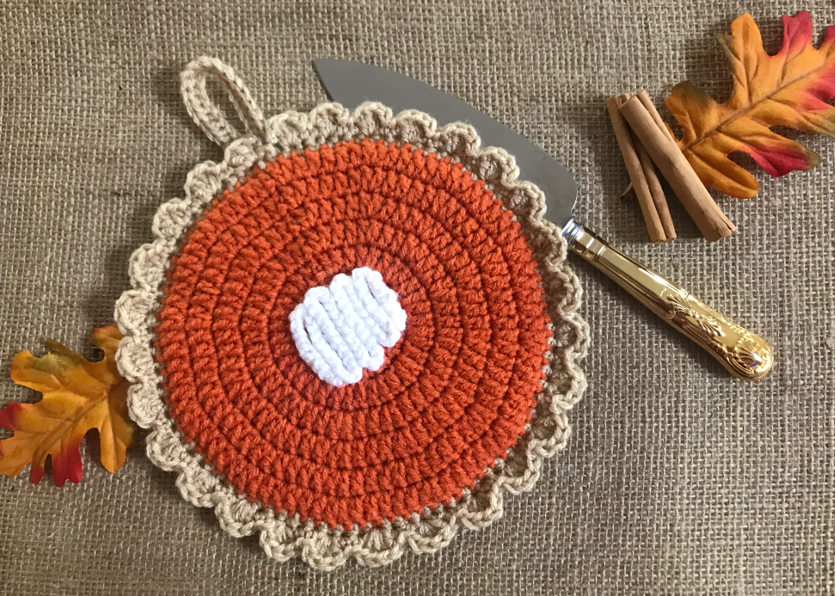
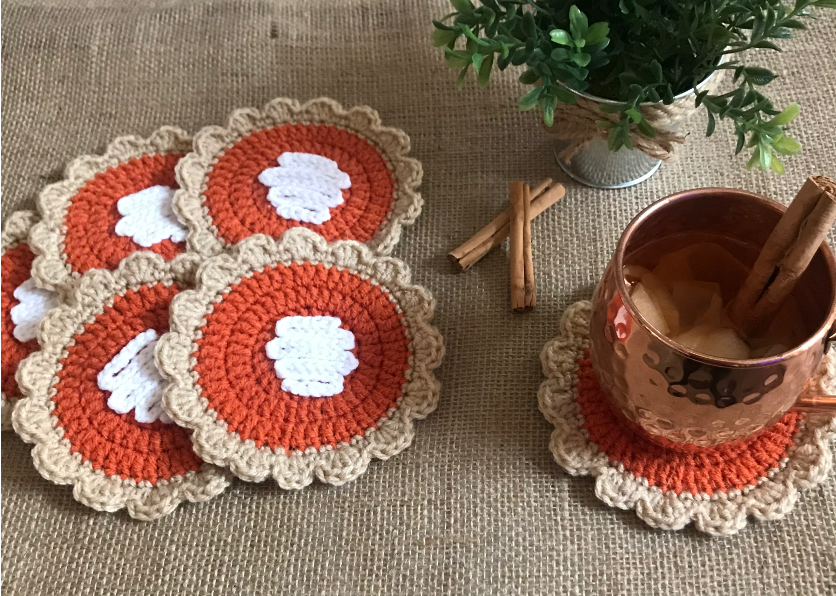
Crochet Pumpkin Pie Hot Pad & Coasters


Yield: 8 slices
Judy's Pumpkin Pie
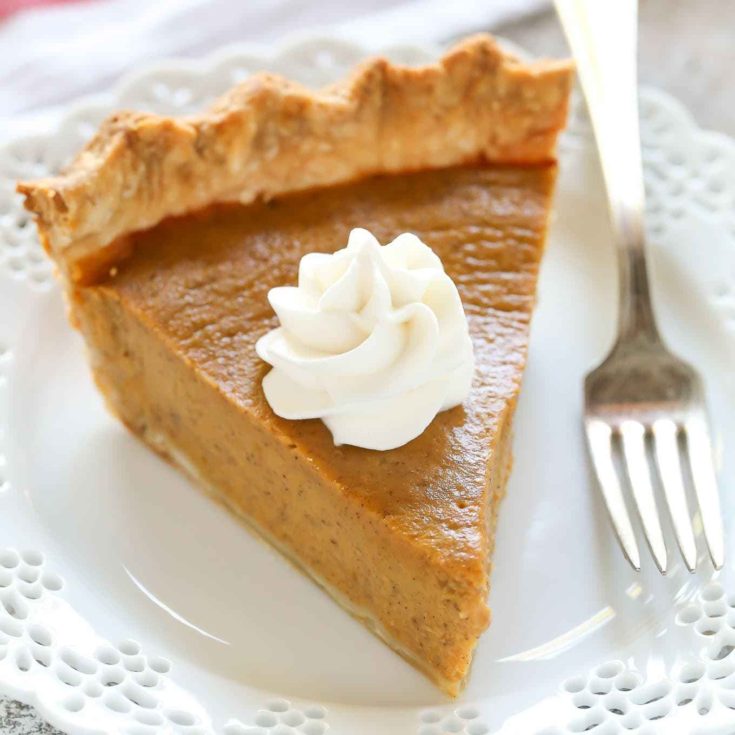
My mom, Judy, has been making this pumpkin pie since she became a newlywed 60 years ago. She found the recipe on the back of a Libby's Pumpkin can, but tweaked it slightly by replacing the cloves for nutmeg. My dad loved it, and she has stuck with the same recipe ever since. Still to this day this pumpkin pie is an absolute staple at our Thanksgiving dinners. Of course, for us, this pie wouldn't be the same without my mom's homemade pie crust (recipe included). SO GOOD! And don't forget the whipped cream!!
Prep Time
45 minutes
Cook Time
1 hour
Total Time
1 hour 45 minutes
Ingredients
PIE FILLING - (recipe makes enough for 1 pie)
- 3/4 cups sugar
- 1 tsp ground cinnamon
- 1/2 tsp salt
- 1/2 tsp ground ginger
- 1/4 tsp nutmeg
- 2 eggs
- 1 can (15 oz.) 100% pure pumpkin
- 1 can (12 fl oz.) evaporated milk
- 1 - 9" pre-made pie crust (if you are not making a homemade crust)
HOMEMADE PIE CRUST - (recipe makes 2 crusts. Use both now or use one and freeze the other for later)
- 2 cups sifted flour
- 1 cup shortening cut into pieces (Crisco Shortening Sticks work well)
- 1 tsp salt
- 3 - 5 Tbsp water
- 2 - 9" pie plates
Instructions
HOMEMADE PIE CRUST (makes 2 crusts)
- Before starting crust, place the 3-5 Tbsp of water in the freezer until you are ready for it.
- Next, sift together the flour and salt. Cut in the shortening with a pastry blender or 2 knives criss-crossing until the dough becomes crumbly.
- Remove the water from the freezer and starting with 1 Tbsp at a time, sprinkle into the flour & salt mixture making a stiff dough by blending with a fork and using at least 3 of the tablespoons of water. If the dough seems too thick or floury, add the remaining 1 - 2 Tbsp of water.
- Form the dough into a ball and then split the dough in half. Form each half into its own ball and reserve one of the balls of dough for your second crust. Keep the second ball of dough in the fridge until you are ready to roll it out.
- Flour your working surface, your rolling pin and the outside of the ball of dough. Roll the dough out and in all directions until it is no thicker than 1/8" thick.
- Once rolled completely out, fold the dough in half and then lay it halfway over your pie plate, then open the other half of dough to cover the rest of the pie plate. Press the dough down the sides and bottom of plate. Trim any excess dough that overhangs the edges, then crimp the remaining edge dough with your fingers.
For 2nd Pie Crust
Repeat steps 5 & 6. You can then either use the crust now for a second pie, or wrap the crust in freezer safe wrap and freeze for a later time. Pie dough crusts will last up to 2 months in the freezer.
PUMPKIN PIE FILLING (makes enough for 1 pie)
- Mix sugar, cinnamon, salt, ginger and nutmeg in a small bowl and set aside.
- In a large bowl, beat eggs, then stir in pumpkin and add the sugar and spice mixture previously made.
- Gradually stir in the evaporated milk then pour mixture into 1 pie crust.
BAKING TIME
- Pre-heat oven to 425°
- Bake for 15 minutes, then reduce temperature to 350°; bake another 40 - 50 minutes or until a knife inserted in the center comes out clean.
- Let pie cool before serving.
- Optional - add a dollop of whipped cream to each slice (pie makes 8 nice sized slices).
ENJOY!

Alaina Jennings
September 26, 2023 at 3:40 pmCan I use hot glue for the whipped cream? Or do you not recommend it?
Lynnette
November 3, 2023 at 6:25 pmHello,
I don’t see why you can’t use hot glue. I’ve used a glue gun on several yarn projects and haven’t experienced any melting of the yarn.
Blessing for a wonderful Holiday Season!
Angela
November 3, 2023 at 3:27 pmThank you for this pattern! It turned out so cute and the instructions were very easy to follow. Quick question -have you had any issues with the yarn melting since it is acrylic?
Lynnette
November 3, 2023 at 6:22 pmHello,
I’m so glad you liked my pattern! No, I have had no issues with the acrylic melting. I’ve made tons of hot pads and coasters and they all hold very well. I especially like my hot pad patterns that are always double layered to protect counter tops from heat. If you are worried about the acrylic yarn you can use 100% cotton yarn which is totally safe for heated objects.
Blessing for a wonderful Holiday Season!